This photo is of two different trivets, but you can easily see the bevel on the left one.
# 225 This did not come out as well as the others. There was a lot of torn grain and cracks that I had to fill with thin and black CA glue after it broke apart. It also came out much smaller and may not actually be effective for use, but I put it on the kitchen counter anyhow.
# 217 Chinese Elm short tool handle. This is a shorter branch from the same tree that # 216 was taken from. After completing # 216 I realized that the handle was too long for the tool's intended use (detailing), so I removed the tool from the handle, created # 217 and inserted the tool into this handle.
Brass ferrule has been inserted and I'm prepared to turn it to its final shape.
In my rush to complete it I failed to burn any decorative lines into the handle.
# 216 Chinese Elm long tool handle. This is from a branch that I pruned off my Chinese Elm tree.
Brass ferrules installed and decorative lines were burned into the handle.
Detail tool inserted and ready for use.
# 215 A & B Arizona Eastern Red Cedar (Juniper) heartwood bowl. this has a 4 1/2" wide base and rim, it's 2 3/4" tall with an interior depth of 2 1/2". I didn't go thinner on the bottom because of the branches in that area and I didn't want to have it tear out of the wood.
Bowl A was started yesterday afternoon and I didn't hollow it out before quitting. As the bowl dried overnight the moisture could only escape through the exterior wall and this uneven drying caused stresses within the wood which is what caused it to crack.
It's always dicey to try to turn a cracked bowl but the only one I've ever had come apart on me was my very first one almost two years ago. Cracks (in my opinion) give character to a piece so I usually leave them in. In this situation it was entirely my fault. I should have kept the speed down to around 500, but it was spinning at 1,350 rpm when it flew apart.
I was standing off to the side, not directly in front of the bowl when it happened. Even if I was in front of it I always wear full gear (turning smock, glove on my left hand, dust mask and a full face grinding helmet that is rated for high impacts. I might get bruised but my face and eyes are well protected. So far I haven't found the missing piece; I have no idea how far it flew.
I then moved on to plan B and this one came together just fine. I think back to when I first started turning 2 years ago and this bowl would have taken me a full day to complete, and I did this one in 90 minutes. Yet the pros would have knocked this out in about 20 minutes. I still have a lot to learn.
Slow motion video of the completed bowl. The slo-mo part starts after several seconds.
Comparison of B to A.
Lots of branches / knotholes in this one.
Great grain patterns.
# 214 Arizona Eastern Red Cedar (Juniper) heartwood bowl. The difference between this one and # 211 is that I removed the majority of the sapwood before I began turning it to try to keep it as red as possible. This is 4 1/4" wide at the rim, 2 1/2" wide at the base, and stands 2 1/2" tall. The finish is Danish oil.
ACK's is my go-to for a lot of my projects. I sand to 220 grit (sometimes 400) first and then I start with First Step tung oil. This is like a gel that you rub into the wood at speed. That is followed up with the Abrasive Sanding Paste. Again, it's rubbed into the wood and buffed with a paper towel at about 900 rpm. Finally, I use the Micro Abrasive Polish using the same technique. When completed this gives you a finish on par with 1000 grit sandpaper, but without all the dust.
After all the smoothing I use either Danish oil (usually), beeswax, shellac, spray lacquer, or spray poly. Since my items are typically not gallery quality the Danish oil is sufficient for most of my work. If I want a lot of gloss then my go-to is spray lacquer.
# 213 Mesquite tiny bowl. Another piece of trash wood that was destined for the trash. 3" rim, 2" base, 1 1/2" tall, and nice and thin. Finished in Danish oil.
Just an angular chunk of wood.
With a chainsaw gash in it that reduced the size of the bowl immensely.
But it came out pretty well.
# 212 Mesquite small bowl. This was another cut-off that I pulled from the trash to see what I could do with it. It came out pretty good. It is 4 1/2" wide at the rim with a 2 7/8" base and only stands 1 3/8" tall. It is finished in Danish oil.
Just a chunk of wood between centers instead of using a worm screw or faceplate.
# 211 Cedar bowl. This blank came from a different log from 208 and 209 and had absolutely no rot in it. However, it did have a tiny crack in the log that later manifested itself in the bowl's side. This has a 5 1/4" wide rim, a 4" wide base, and is almost 4" tall. It is finished in a clear Danish oil and is quite attractive as long as you don't mind "character" in the form of the crack.
Finding center.
See that itty-bitty crack?
Getting through the sapwood and reaching that red heartwood. This is most likely western red cedar and it sure smelled good when turning it. Cedar dust can have lung and pulmonary effects when exposed to it over the long term so I always wear a dust mask and have both my dust collector and my air filter running.
See that crack now? As the wood continues to dry - it was only cut down six months ago and is still considered to be "wet" - it will shrink and that crack should be expected to grow.
The red darkens up a bit once there is a finish on it.
# 210 Mesquite bowl. This was made from a cut-off containing numerous branches. I pulled it from the trash to see what I could do with it. It is 4" wide and 2-3" tall with a 3" base. It is finished with Danish oil. It was difficult to figure out where the top and bottom was going to be.
That big branch sticking out at the bottom would come back to haunt me later.
Note the triangle shaped hole where the branch had been poking through.
# 209 live edge Cedar bowl. See the notes on 208. This has a 7" rim, a 5 3/4" base, and is 2 1/4" tall. It is finished in poly. I made a mistake by signing this as mesquite initially, I crossed that out and re-wrote it as cedar.
In this situation I took my Dremel tool to the rotted portions in the rim. Bowls like this require hours of hand sanding because you can't just spin it on the lathe with those dips in the rim and the bark still present.
# 208 Winged live edge Cedar bowl. 208 and 209 both had a lot of punky wood (rot) that I had to work around. I hardened a lot of it by using a large quantity of shellac and letting it soak in over a couple of nights. This is 9" by 7" and almost 11" corner to corner. The bowl itself is 5 3/4" wide and it sits 2 1/2" tall. It is finished in poly.
# 207 Ash Vessel. This is from the same log as the previous # 205. It is 5 1/2" tall by 3 1/2" wide at the base and 4" wide at the rim. Finished in Danish oil.
I started with this.
Turned round and a tenon on the end.
I mixed some epoxy with crushed turquoise rock powder to give an accent to the bug holes in the side. I left the bug holes empty on 205.
Can you guess its purpose?
207 on the left with the accents and 205 on the right with the empty bug holes.
Completed photos. The vertical crack was filled with black CA glue.
After posting the photo I realized that I forgot to write 207 on the bottom so I fixed that.
Slo-mo video. It starts off fast and finishes fast but the middle part is 1/4 speed.
# 206 Mesquite dish. This was just a cut-off that had been laying in the yard for a week or so and instead of throwing it away I decided to make "something" out of it and this small footed dish showed up.
The chunk I started with.
The foot that it sits on is only about 1/32" high and isn't noticeable unless you pick up the dish and look at it from the side.
# 205 Ash vessel. This wood came from the neighbor's tree in their front yard. They failed to properly water it and after it died they had it cut down and I took some of the wood in 2023. It stands 5 1/2" tall, is 3 3/4" wide at the base and 4 1/2" wide at the rim. It has numerous bug holes in it, some bark inclusion, and has a light lacquer finish. It's quite a good looking item.
# 204 03/08/25 Mesquite small bowl with a curved interior. This would be good for holding your rings as the curved sides make it easy to remove the items inside.
# 203 03/08/25 Mesquite drink coaster. The intention here was to have a small bowl with very thin walls but I went too thin and actually tore through the side of the bowl. Woodturners do not make mistakes... we merely have smaller projects!
# 202 03/08/25 Mesquite tea light candle holder.
# 201 03/08/25 Mesquite natural edge bowl. If it was a live edge bowl it would still have the bark on it.
# 200 03/03/25 Mesquite bowl. I was hoping my 200th bowl would be a great one, but it was not to be.
I started with this.
I used the bandsaw to slice off the protruding branch and then located the mounting hole off to the side to accommodate the missing wood on the left.
As I began turning the wood round the crack demons appeared yet again. The stains are from CA glue. I let it sit over night and then finished it the following day.
I guess you could say it has "character". I have kept bowls 1, 100, and now 200, and this is the worst one of the bunch.
You can see how rough the bottom is; this is due to rot within the wood. You can sand for hours and never eliminate this.
# 199 03/03/25 Mesquite bowl. My friend Phil whom I've worked with and known since 1983 was in town with his wife Doree for Spring Training and we met up for dinner, after which I presented them with this.
The goal was to make a BIG bowl, but the rot and crack demons raised their ugly heads, forcing me to reduce this in size.
My lathe accommodates a 12" round blank.
I had to bring the chainsaw inside and slice off this little bit to allow the whole block to clear the bed.
Huge rotten piece in the side of the wood.
Cut off the rotten part (or so I thought)
More rot appeared as I turned it smaller.
I cut off the upper portion of the root.
Finally got to some good wood.
# 197 & # 198 03/03/25 Cedar bowls from the same log. This wood was very punky (rotten) and cracked so what was intended to be one bowl turned out to be two small bowls.
This will give you an idea of how rotten the wood was.
Separated into the two separate pieces.
Huge amounts of cracks.
I went through the bottom of the bowl and filled the hole with terracotta Milliput epoxy.
Rot, rot, rot.
I decided to cut off the upper section which contained the majority of the root.
When the upper section broke off it hit me in the arm, hit the dust curtain, and ended up about 10 feet away. That's why I always wear a face shield.
Working my way down through the rot.
I used black CA glue to fill in some of the cracks.
# 196 02/27/25 Grapefruit wood bowl. See all the details on # 195 as this item is being processed the same way.
# 195 02/26/25 Grapefruit wood bowl. This is currently drying after being "rough turned". Rough turning is also known as "twice turning" because you turn a fresh, wet piece of wood to help it dry faster so that it can be final turned to its ultimate size and shape. This went into a bag of its own shavings on 02/26 with a moisture content of about 25%. I'll check the moisture level at the end of March and see how it's doing. I shoot for a level of under 15% and preferably under 12% before I do a final turn. You can do a final turn at a higher moisture level but the bowl is likely to warp and/or crack as it continues to dry until it reaches equilibrium with its environment. This wood came from a neighbor who had their tree removed.
Just in the short period of time that these shavings were removed the bowl began to crack. I went to my shop fridge to get my CA glue and by the time I walked back the lower crack had begun and I watched it expand as I was applying the glue.
These are the fresh shavings that the bowl was packed into.
# 194 - Mesquite weed pot (dried flowers container). 5 1/4" tall by 5 1/2" wide at the Wing, and a 2 1/4" opening. Finished in beeswax other than on the base where it is signed; that has a coat of Danish oil. My wife has already grabbed this one.
I started with this log.
As I got the bark off a lot of longitudinal cracks appeared.
So I turned the wood sideways and began working it from this direction.
I'm not sure why I left the wing at the bottom; it just looked "different".
Almost reaching its final form.
Completed. That's the remnants of a branch you see near the top.
Signed.
Holding a couple of flowers. The image is washed out because I used a flash and shouldn't have.
# 193 - Mesquite live edge bowl. 5 1/2" wide by 2 1/8" tall. Finished with spray lacquer to give it that shine. My former next door neighbor will be turning 96 next month, so this will be going to her. I only took a couple of photos.
# 192 - Mesquite tool handle. Unfortunately, I don't have any "pre-turned" photos as I started this over a year ago. It is 16" long and 2" wide at the thickest parts. I used epoxy to secure it in place and used a brass ferrule to help keep the wood from splitting at the end. Finished with Danish oil.
# 191 - Grapefruit pen/pencil holder (pencil pot). This came from the neighbor across the street that gave me the ash wood from that tree about 18 months ago. This will go to my dentist's office for their use. I made them one last year but it is tiny in comparison.
Not looking good.
Looking even worse.
I filled the cracks with black CA glue.
I also soaked the punky wood with shellac to try to harden it.
The crack extended down into the base so I zip-tied it in an effort to keep it from coming apart. It worked.
Soaked with CA glue to help harden it even more.
These cracks extended into the interior so I had to put tape inside as well.
Much improved!
Lots of time and effort, but it came out pretty well.
The existing pencil pot at the dentist's office.
# 190 - Mesquite wavy rim bowl. 6 1/4" wide at the rim by 3 1/4" high at the tallest point of the rim. It sits on a 1/2" foot. Finished with shellac.
Starting chunk of wood.
Ready to go on the lathe.
Mounted on the lathe.
Exterior partially formed.
Exterior and interior mostly completed.
There was a very fine crack running across the side of the bowl which I filled with black, medium-thick CA glue. The tape is there to help prevent staining the surrounding wood.
After the glue dries the excess is turned away, just leaving a fine dark line.
Completed, sanded, and Shellac applied.
In order to remove the tenon from the bottom of the bowl, a "jam chuck" had to be created that the bowl would press against while I removed the tenon. I turned this semi-circular piece to remove all the bark and shape the exterior to closely match the interior of the bowl.
Non-slip material is placed between the bottom of the bowl and the jam chuck to prevent marring the bowl's finish. Here you have a good view of the tenon - the tailstock is holding it tight to the jam chuck.
Here you can see that I turned away almost the entire portion of the tenon. At this point the speed of the lathe is down to about 200 rpm and I'm taking very light cuts. Just as soon as the tool cuts through that little nub I'm hitting the off switch with one hand and grabbing the bowl with the other hand to keep it from falling. The tiny bit of residue left over is sanded away. In this photo you can also see the crack that was filled with the black CA glue.
Completed photos.
# 189 - Mesquite tortilla warmer. 3 1/2" tall by 7 1/2" wide. The base is 2 3/4" high and the interior space is 7" wide with sides that curve to meet the bottom, making it easier to grab the tortillas at the bottom. Exterior is finished in shellac with beeswax being used to complete the interior of the bowl. The turquoise in the center of the lid is a two part epoxy called Milliput. After it is formed and pushed into the hole it is left to harden and then shaped by tool and sandpaper the following day.
This was a commissioned piece for a friend so I documented almost everything with lots of photos, but this is a small selection of them.
The wood I started with.
Split in half, bowl and lid sizes marked out.
Blank trimmed to a rough circle.
The exterior of the base is completed. The center section is left for the very end so that I can sign it and then use Danish oil on that portion.
The completed interior.
Beginning to create the lid. That crack was a persistent problem.
Filled with sawdust and black, medium-thick CA glue.
The underside of the lid. The crack is still visible. The dark area is where shellac is used to prevent the CA glue from staining the wood, and the crack has been filled with thin clear CA glue.
The top of the lid with the turquoise colored "button". Can you find the crack?
The completed bowl.
Signed, but before the Danish oil was applied to the center.
# 188 - Mesquite bowl. 4" tall by 5 1/4" at the rim and 2 1/2" at the base. Finished in Yorkshire Grit, ACKS abrasive paste, Danish oil and beeswax. Once again, multiple hours of sanding was required as the knotholes lost their branches during the process so the holes had to be filled with CA glue and sawdust, and then restart the process. It's a very attractive bowl and would be good for snacks, candy, etc.
Started with this.
This "catch" tore the gouge right out of my hands and it fell to the floor.
Outside shape finalized.
Turned around in the chuck in order to hollow out the interior.
During the hollowing process of the interior the gouge knocked this branch clean out of the bottom. I thought the interior bottom was smooth and didn't realize that the branch was protruding out into space.
You can see how much the branch sticks out when I pressed it in to be flush with the exterior.
This hole remained after removing the branch entirely.
The exterior of the hole was sealed with tape and the inside hole was filled with medium thick brown CA glue and sawdust. After the tape was removed there was a slight indentation on the exterior, so the tape was reapplied below the hole to prevent staining, and then more CA glue and sawdust was applied from outside the bowl and left to dry.
After removal of the tape and re-sanding.
After sanding and reapplication of the Grit and paste. The holes just look like knotholes again.
Complete photos.
The hole is still there but it's difficult to see.
# 187 - Mesquite "winged" bowl. This was my first attempt at making this style bowl and I found it to be extremely difficult to create, and even more difficult to sand. Sanding took hours to do with a power sander, block sander, and hand sanding. Because of the shape I could not do the Yorkshire Grit or the abrasive paste so it was only hand sanded to 400 and then two coats of Danish oil were applied. It stands 2" tall at the highest point on the wings, 8 1/4" wide, and the bowl itself is 3 7/8" across and 1 1/4" deep.
The chunk that I started with.
After the initial design was determined. It's a little darker because I had just wiped the dust off with a damp cloth.
Trying to sand it while it was attached to the lathe was very frustrating so I clamped this in my vise with cushioning between the wood and the jaws. This was much more effective.
Remounted to start wiping with oil.
Completed shots.
# 186 - Ash tealight candle holder. 1 1/2" tall by 3 1/2" wide at the base. Finished in Yorkshire Grit, ACKS abrasive paste and Shellac. The large defect on the side is where a branch was originally. The smaller defect on the side is a bug hole. This item was part of yesterday's potpourri wood but I thought the bowl was too tall so I cut this section to be used as a candle holder.
Notice that the pith is slightly offset from the center of the turning. (pith is the very center of the wood and the rings grow outward from there)
# 185 - Ash Potpourri bowl. 3 1/4" tall by 4 1/4" wide at the rim. Finished in Yorkshire Grit, ACKS abrasive paste, beeswax on the side and top, and Danish oil on the base. There are two bug holes in the side with one of them penetrating all the way to the inside of the bowl.
Bug holes. The one on the right goes all the way through.
Species not indicated because I'm not 100% sure.
# 184 - My first potpourri bowl. Mesquite. 3 3/4" tall by 5" wide at the rim. Finished in Yorkshire Grit, ACKs abrasive paste and Danish oil. I may spray it with lacquer in a couple of days after the oil has completely dried.
Signature is burned in because the ink doesn't show up well on the dark wood.
In process.
Lathe is slowly spinning with lots of oil on it.
# 183 - Mesquite lidded box with the lid insert instead of overhanging the base. 3" tall by 4 1/2" wide at the base. Finished in Yorkshire Grit, ACKs abrasive paste and Danish oil. The lid's knob is topped with turquoise colored Milliput putty in order to fill a hole that was there.
# 182 - Mesquite lidded box. 4 1/2" tall by 4 3/4" wide at the base. Finished in Yorkshire GRIT, ACKS abrasive paste and Danish oil.
# 181 - Mesquite lidded box. 4" tall by 5" wide at the lid. Finished in Yorkshire Grit, ACKS abrasive paste and Danish oil.
Beginning chunk of wood.
Flattened off one side so I could attach a faceplate.
Finishing off the lid.
Holding on to the lid's knob so that the inside of the lid can be sanded and finished. Non-slip drawer liner is used between the wood and the metal chuck to prevent marks from clamping it.
Interior of the lid after finishing.
The container portion attached to the lathe.
Showing the grain of the container.
After hollowing out and finishing the interior of the container.
And the exterior.
A look at the inside and outside.
The container secured in a set of Cole Jaws so that I can turn off the tenon and then finish the lower portion.
Completed lidded box.
Completed sections.
Completed bottom portions.
Completed video.
# 180 - Ash bowl. 2 3/4" tall by 4" wide at the mouth. Finished in Yorkshire Grit, ACKS abrasive paste and beeswax. I rushed this and didn't completely flatten the bottom interior and there is a slight hump in the center. Live and learn.
The wood had a large void in the side so I sliced off the section you see marked on the top.
I mounted the flat side to the lathe and began to turn it round.
Interior finished.
Completed photos and video.
# 179 - Ash lidded box. 4 1/2" tall by 4 1/8" wide at the base. Finished with Yorkshire Grit, ACKS abrasive paste and Danish oil. This was my first "real" lidded box. The hole you see in the side near the bottom is a worm hole. I had considered filling it with turquoise Milliput but decided to leave it natural. The outside rim of the lower section has a thin film of beeswax in order to loosen the grip between the two pieces.
Started with this.
After rounding it, I picked a spot to split the pieces and then modified that before I actually started cutting.
Several hours later here is what I wound up with. Note how the grain transitions from one piece to the other.
# 178 - Mesquite (it may actually be ash but I've already marked it as mesquite) pencil pot or short, squat bowl with turquoise inlay. 2 7/8" tall by 4" wide at the opening and 3 1/2" wide at the base. Finished with Yorkshire Grit, ACKS abrasive paste and Danish oil. This was supposed to be a taller pencil pot to begin with, but due to a large crack and bark inclusion I had to cut it down considerably.
I began with this.
I attempted to cut away the crack/inclusion but didn't have a lot of luck, so I reversed it in the chuck and attacked it from the other direction.
After hollowing it out I was still left with a crack which I filled with Milliput turquoise inlay which was what I should have done to begin with.
After letting it harden overnight I returned to it in the morning and smoothed it out, followed by sanding and finishing.
# 177 - New Year's Day 2025 - small Mesquite vase - 4 1/8" tall by 2 1/2" wide at the base and 1 1/2" wide at the top. Finished in Yorkshire Grit, ACKS abrasive paste, and beeswax. It is too narrow for a glass inserts and a tea light candle, and it's too short for a tube insert to hold water for flowers, so it can only be used for artificial flowers with short stems.
This was unintentional which is why there's no raw wood photos; I had only gone into the shop to practice on some junky wood but this shape presented itself so I went ahead and finished it off as a project.
I began to drill it with a forstner bit for the glass inserts but soon realized I'd be almost down to the base before the insert would fit in.
Hole drilled.
Completed photos.
# 176 - Mesquite bowl - finished with Danish oil and spray lacquer. This is the other half of the wood used for # 175. On Christmas Day I found out that one of my former co-workers was battling cancer, so I made this bowl for her.
That branch poking out from the side would turn out to be a problem.
I was in such a rush to do this bowl that I got ahead of myself. I drilled the center hole before I cut a circle on the bandsaw, so I had to remove it from the worm screw and lop off the corners at a minimum.
Here you can see the remains of the branch that was sticking out; now it's just a hole. In addition, as I was rounding off the corners a large chunk flew off the wood (just as it did with # 175) so the diameter of the bowl had to be greatly reduced to accommodate that problem.
Finished exterior.
Finished interior.
Random completed photos and video.
# 175 - Mesquite bowl - finished with Yorkshire Grit, Danish oil, and spray lacquer. Last year my neighbors received wood turned gifts but this particular neighbor did not make it down for the season so I created this specifically for her. Although they were gone they had some mesquite trees on their property removed and I salvaged some of the pieces so it's entirely possible that this bowl was made from one of her own trees.
Raw log about to be cut in half on the bandsaw.
Beautiful grain inside.
Corners cut off and mounted to the lathe.
Mounted with a faceplate. Not a typical process for me.
When a chunk of wood breaks free at 750 rpm and hits you in the knuckle it makes you glad you were wearing a glove.
A tenon was created on the flat portion of the wood and then the blank was reversed and secured into the chuck. The interior of the bowl now needs to hollowed out.
I was too aggressive when hollowing and I caused the tenon to tear loose from the chuck.
So instead of trying to create another tenon and loosing another 1/4" of wood from the bottom I created a mortise that the chuck will expand into in order to hold the blank in place while turning. The downside to a mortise is that it causes the center portion of the bowl to be thinner in that area and the possibility exists of cutting right through the bottom of the bowl. And yes, I've done that.
As you can see here, no funnel was created and the bowl survived.
From that point on it was just a matter of sanding, applying the various coats of finish and waiting for it to dry. The bowl is lighter / darker just depending upon how much light is hitting it and from which direction. I'll work on the other half of the log in a couple of days.
# 172, # 173, # 174 - Mesquite bowls - finished with Yorkshire Grit, ACKs Abrasive paste, and Danish oil. # 174 does have a light coating of spray lacquer. All three came from a rough turned item from earlier this year. I don't remember why I turned it in this shape unless I was possibly going to make some sort of vase out of it. No matter what the plan had been I decided to just make three small bowls from it and proceeded to cut it up into sections and then turn each piece. There were large cracks in the center of each one which takes away from the overall appearance but "in for a dime, in for a dollar" so I went ahead and finished each one.
Original piece.
The bottom section became the first one I turned. # 172
# 173 was the top section.
# 174 was the middle section.
All three completed bowls.
# 171 - Mesquite flower vase - 6" tall by 2 1/4 wide at the base. This was rough turned earlier this year and left to dry. It only "moved" a very small amount so it was quick work to round it and sand it and apply a little Danish oil. The roses were provided by my next door neighbor's garden.
#170 - Mesquite - This is 4 1/2" tall at the highest point and 8" wide so it surpasses yesterday's "largest bowl to date" by 1/4" in height. This bowl was "rough turned" in April of 2024 and set aside to finish drying. At that time the moisture content was in excess of 25% and today I couldn't even get a reading on the moisture meter. Surprisingly enough, the bowl was only out of round by 1/8" overall. The bowl was finished with Yorkshire Grit, Danish Oil, and spray lacquer which is what gives it that shine compared to most of my other bowls which are typically only oiled.As completed in April. The only things needed here were to correct the out-of-roundness and then deepen the interior and thin the wall.
Completed photos. The white ring in the first photo is the overhead light in the lightbox.
Signed.
# 169 - Mesquite - At 4 1/4" x 8" this is my largest bowl to date. Finished in Yorkshire Grit and ACKS Abrasive Paste with a top coat of beeswax.
After trimming off the corners.
Mounted to the worm screw on the lathe.
I had not noticed these bandsaw cuts earlier when I trimmed the blank so I must have done this when I was originally cutting the 9x9 blank. I guessed that they didn't go too deep and I'd be able to cut them away.
Exterior completed. Nice grain and coloration.
I realized that the cuts were far deeper than I had thought so I just left them as is and decided to remove that upper section when I hollowed out the interior.
Interior photos.
Signed.
Nestled among all my typical sized bowls.
# 168 - Payback - In October of 2023 I was informed that a woman would be having a 30+ year old mesquite tree removed and that she would allow me to have some of it. I rented a pickup and went to her house with my chainsaw and cut down the larger sections that the landscapers had already removed and then I placed those in my truck and took them home. I prepped them and set them aside to dry, especially one particular piece.
In December of 2024 I took that one piece and made a bowl for the woman that allowed me to take the wood. She and her husband had planted that tree together when they first purchased their house and its removal was very emotional for her because she had just recently lost her husband, so this was made so that she would forever have a piece of that tree and the good memories it created.
The tree that started it all.
The blank. This was roughly 9" square at the start and it finished right at 8".
How the bottom looked just before I flipped it around on the lathe.
How the interior looked after hogging out all that wood.
I then put it into the Cole jaws so that I could safely remove the tenon from the bottom of the bowl.
The completed bowl, finished in Danish oil and a thin coat of shellac.
Signed.
# 167 - "Jigsaw" - A 45+ year friendship with my wife resulted in this commission. She wanted several candle holders and I suggested something like this and over a period of several months we worked out just what it should look like.
The block was about 12" square to begin with and finished at about the same dimensions.
The initial concept.
Another concept.
The final product. The blue is a touch of blue Milliput to simulate turquoise and it's filling a bug hole. The item will be going on an outdoor bar so it has several coats of Danish oil and a thin coat of shellac. The bark was retained and the surfaces were not smoothed as the client wanted a bit of a rustic look to it. The idea was that she would keep the pieces all together when it sat on the bar, but when she would host a party the individual sections would be spread around the patio and back yard.
Only one section was signed.
At its new home.
# 166 - Treasure to trash - the opposite of # 165 - I knew what I wanted to make, but the best laid plans don't always come to fruition.
I had a block of mesquite a little over 12" square and since my lathe won't handle anything larger than a 12" circle I cut a 11.5" circle on my bandsaw.
There was a defect on one side but I went ahead to see what I could do with it.
As I began turning the rim and base the defect became more obvious and I had to cut deeper than I had wanted to.
This was on the opposite side of the large defect but this could be sanded out.
I sanded the finished bottom and then applied some Milliput turquoise epoxy to the holes and left it to dry overnight.
The next morning I began turning away the excess.
Sanded and finished.
I etched where the jaws of the chuck would be going.
A 1/8" deep channel was created for the chuck's jaws to expand into.
The chuck attached to the wood.
Removing the faceplate which is what had been holding the blank to the spindle on the headstock.
Removing the wood in the center of the platter.
In my efforts to get a perfectly flat bottom of the platter I made the wood too thin and actually went through the bottom. That's a portion of the chuck's jaws that you see near the center.
I went ahead and finished the platter so I could see how good "it would have looked" if I had done a better job.
The view of the entry cut from the bottom. This will go on the shelf with my other Offerings to the God of Woodturning.
# 165 - Trash to treasure - I challenged myself to make "something" out of this piece of scrap mesquite wood that probably belonged in the fire pit. You can see the large "wing" sticking out from the original scrap as well as a chainsaw gouge that both had to be turned away. This required an immense amount of hand sanding time both on and off the lathe. It is finished with Danish oil. This stands 1 5/8" tall at the highest point on the end and 1" tall at the lowest point on the side, and it is 5 1/4" end to end and 3 3/8" side to side.
Several shots to show what a piece of trash it was to begin with.
You can see how one side has a long wing that I tried to keep, but in the end it was just too fragile so I removed it. The dark circle on the bottom denotes the size of the tenon I needed to create. I had to go much deeper into the wood until I could get enough wood to complete the circle.
Here I was trying to undercut the rim to give it a little "flair".
Here you can see how far the wing extends out past the bowl. You can also see the remains of some brown CA glue that I applied to keep the bark in the area in place.
Cutting off the end of the "wing".
The bowl shape is getting closer.
Completed
# 164 - In progress
After removing most of the bark I had to trim down the blank even more due to a large split in the wood. You can see that marked out in pencil on the side of the blank.
I stopped at this point because it is still wet (high moisture content) so I took it off the lathe and set it outside to dry for a couple of weeks.
There are cracks on each end so I'm hoping that they don't get much larger during the drying process.
# 163 - 04/25/24 - Mesquite sapwood tea light candle holder - 2.5" tall by 2.5" wide at the base and 2.25" wide at the rim - finished with Danish oil and beeswax (Yorkshire Grit was not used so as to not lose the color of the sapwood)
# 162 - 04/24/24 - Live edge Mesquite bowl made from the other half of # 161's log - 3.25" at the highest point and 1.25" at the lowest, 6.25" at the widest point and 5.75" at the narrowest - finished in Danish oil.
This is the first project where I've photographed the completed item in a light box.
As I was turning and shaping the base a crack appeared in the bottom and propagated up the side.
I stopped at that point and applied medium thick brown CA glue to the crack and left it to dry.
The top of the bark section had a nasty bit of a branch included that I would have to be careful with.
Hole drilled for the drive spur to sit into.
Middle of hollowing the bowl. The protruding branch in the upper left corner disappearing while I was doing it. I never heard it or felt it when it let go and I couldn't find it anywhere.
Hollowing complete on 04/23. Now it needs to be smoothed and sanded and oiled the next day.
While clearing out all the shavings from my tool rack that sits on the wall behind the lathe I found the missing branch section. It was wedged between the wall and a couple of tools. Again, I never heard it leave the bowl.
Sanded and oiled. Sanding oblong items like this with edges of a variable height is very difficult to do.
The foot is recessed such that the rim of the bowl floats 1/8" above the surface.
# 161 - 04/21/24 - Live edge Mesquite bowl made from a half log - 3.25" at the highest point and 1.75" at the lowest, 7" at the widest point and 5.75" at the narrowest - finished in Danish oil.
I started with a log.
I split it in half.
The bark portion was attached to the headstock and the bottom of the bowl was rounded. Then the bowl was reversed and I began hollowing the bark side being careful to not cut too far out to the sides.
Completed and oiled.
# 160 - Begun 04/18/24 - completed 04/20/24 - Twice turned live edge mesquite bowl - 4.25" tall by 5.5" wide at the outside rim and 4.5" wide at the inside rim, and 4" wide at the bottom with a recessed base that sits a little under 1/8" taller than the bottom of the bowl to give it that "floating" look. Finished in Danish oil. The interior was still at 33% moisture this morning before I did the final turn, and the bottom warped enough in the few minutes between signing the bowl and applying the finish that it wobbled when set on a solid surface, so I had to sand down the high spots and re-sign portions of the bowl. Because the rim opening is smaller than the outside wall of the bowl (6") this is technically referred to as a Hollow Form".
Initial log. I cut a slice off on side so that I had a flat space for the faceplate.
I have six inches of clearance between the spindle and the bed of the lathe. The bark of the log was brushing the bed as it spun.
After determining a basic shape on the 18th I applied a generous amount of CA glue to the edges of the bark where it meets the sapwood in an effort to keep it in place.
I used my Sand-O-Flex sander to smooth the remaining bark on the exterior. This removes the majority of sharp edges which may catch on the turning tool and cause the bark to rip off the wood. You can see a large natural hole in the top of the bowl which fortunately only went down about one inch and was turned away.
On the 19th I hollowed out a large portion of the bowl, yet leaving fairly thick sides and bottom. After about six hours I tested the moisture content and while it was below 10% on the exterior sides it was 40%+ at the interior bottom. I have a large shop fan blowing on the bowl and it will circulate the air all night in an effort to reduce the moisture further. I have a woodturning meeting tomorrow so I may not get to this again until the 21st. I can only hope that the bowl does not crack while it's drying.
Completed on 04/20/24
The bowl sits on the center base where the date is notated. That section is a little less than 1/8" taller than the surrounding section so it makes it appear that the bowl is floating off the surface when looked at from the side.
# 159 - 04/14/24 - Acacia bowl with cracks - 5.5" tall by 5.75" wide at the rim and 2.75" wide at the base - finished in Danish oil. Depending upon the light and the way it's held, you will see shimmering golds and yellows in the grain which is called Chatoyancy (sha TOY en cy), a term taken from gemology. The original intention was to fill the cracks with turquoise colored epoxy, but once the bowl was reversed in the chuck to hollow it out the exterior was out of round and had to be trued up again. That meant removing more wood and the epoxy that was with it. I think this is the deepest bowl that I have created yet, and it took a long time and a lot of effort to do so.
I have provided a lot of step by step photos for this item.
I used the "center finder" laying on the lathe bed to try to find the approximate center. You can see the pencil marks on the end of the blank.
A hole is drilled which is only used to help locate the center when I screw on the faceplate.
The faceplate has a small screw in the very center that can be screwed into the wood, but I'm only using to keep the faceplate centered while I screw in the surrounding screws on the plate.
The faceplate is screwed onto the spindle of the headstock and the tailstock is brought up to provide additional support. You can also see in this photo that the tailstock center is NOT in the center of the blank. That's because the other end was not cut at a perfect 90 degrees to match this one.
First step is to begin rounding the blank and deciding upon a shape.
Here is the proposed shape with all the cracks visible. CA glue was applied to all the cracks and left to dry for 3 hours.
Upon returning to the bowl, the excess CA glue was turned off, a Dremel was used to deepen the cracks where the glue had been applied, and then the epoxy was placed into those cracks.
The excess epoxy has been turned away, and the bowl has been sanded and polished with Yorkshire Grit and ACKS abrasive paste. Unfortunately, as mentioned previously, once the bowl was reversed in the chuck it was out of round and truing it up again required removing more wood, and with the wood... the epoxy as well.
Some of the images have been enhanced a little because the photographs show it to be dull unless you're in the right light.
# 158 - 04/12/24 (3rd item today) - Acacia bowl with cracked rim - 2.75" tall by 4" wide at the rim and 4.25" wide at the base - bark inclusions near the sapwood base.
# 157 - 04/12/24 - Acacia tea light candle holder - 2.25" tall by 3.5" wide at the rim and 4" wide at the base - finished in Danish oil - one crack running through the rim from side to side.
Started with this blank.
This chunk came off the blank when it was spinning at 600 rpm, and it hit me in the forehead.
If I hadn't been wearing this I would have had quite a headache.
The original thought was one tall bowl or perhaps a vase, but I changed my mind and cut the piece in two. I have a light shining from behind the wood so I can see how much is remaining as I use a parting tool to create the two pieces.
After I removed the tailstock I merely gave the right side a quick twist and they separated. I will work on # 158 later tonight or tomorrow.
End result.
Here you can see the obvious crack that runs through the piece.
# 156 - 04/12/24 - Acacia bowl - 2.25" tall by 3.75" wide at the rim and 3" wide at the base - finished in Danish oil - one large crack near the bottom (this came from the same log as # 155) filled with sawdust and glue. Other smaller cracks that are visible upon closer inspection. This kind of bowl is for people that like "character" and "defects" in their items. This cannot be a utilitarian bowl because liquids would seep through the large crack.
# 155 - 04/11/24 - Acacia bowl - 2.75" tall by 3.75" wide at the rim and 2.75" wide at the base - finished in Danish oil - one large crack on the side filled with black CA glue and sawdust and then sanded smooth. The rest of the bowl is extremely smooth and has great grain. This is a sidegrain bowl.
# 154 - - Mesquite vase. This has been roughed out and now it will sit and dry for a couple of weeks, or possibly less. It is primarily sapwood so it should lose its moisture quickly, but I'm hoping it doesn't crack when it does so. I do have the vase insert in place so maybe that will help to control the warping a bit, but wood will do what wood does... move.
You can see the wood sealer on both ends of the branch. This is applied when the wood is cut to allow the wood to dry more slowly.
LOTS of sapwood in this piece.
About 7-8 inches tall.
# 153 - 04/07/24 - Palo Verde candle holder with Milliput turquoise accent - 1.5" tall by 2.75" wide at the base - finished in Danish oil. This may be the end of the Palo Verde for a little bit.
I applied the Milliput before I went to lunch and then sanded off the excess when I got back.
This took a couple hours of sanding due to all the various contours that had to be sanded by hand.
When I put the piece into my expansion jaws and tightened them up I heard the wood crack. Fortunately, the Milliput helped to keep everything together and the holder stayed in one piece.
# 152 - 04/06/24 - Palo Verde candle holder - 3" tall by 2.5" wide - finished in Danish oil.
# 151 - 04/06/24 - Palo Verdy candle holder - 2.5" tall by 3.25" wide at the swell near the top - finished in Danish oil.
# 150 - 04/03/24 - Palo Verde candle holder - 2.25" tall by 3" wide - finished in Danish oil. No pre-production log photos.
# 149 - 04/02/24 - Mesquite candle holder - 2.5" tall by 2.25" wide at the base - finished in Danish oil - a gift for one of my wife's nurses.
The holder was intended to be a lot larger, but due to the amount of cracks in the wood (cracks are still visible in the finished product) the holder wound up being about 1/10 of the log it started from.
As bits and pieces continued to fly off during the turning process I made a point of standing off to the side to avoid direct hits.
# 148 - 04/01/24 - Palo Verde pencil pot (pen holder) - 4.75" tall by 4" at the rim and 3" at the base - finished in beeswax, and a little Danish oil inside the base. The wood is very dark and you can barely read my signature. This will be going to my wife's doctor's office who also happens to be a woodworker. It has the signs of cracks on the exterior but they were filled early on with CA glue and they just appear as darker marks within the grain and cannot be felt by touch. The entire project is extremely smooth except the very bottom of the interior and the exterior base due to those areas being part of the pith (center of the log). Those areas are also extremely dry and sucked up the oil so fast I could see it being absorbed into the wood as I applied it. I did not take a lot of "in progress" photos on this project.
Same log as the 2-3 prior projects.
Overall it would have been too tall so I parted off a 4" section. The remaining part will become what is called a "glue block" to be used to help hold another piece on the spindle.
As it is intended to be used. You could also use it for a very small planter, or???
# 147 - 03/27/24 Palo Verde - price will be on the FB page - 3.25" tall by 5.50" wide - finished in Danish oil and spray lacquer - branch intrusion from the interior to the exterior - several cracks including one that penetrates the wall - some sections of rough wood that wouldn't sand out. This is the sibling to yesterday's bowl; cut from the same log. I will try an end grain pencil holder with the next section of the log but if I have as many problems with that as I've had with these two side grain bowls... the rest is going in the trash.
Started with this - very similar to yesterday's log.
Formed the tenon on the base and the outside shape of the bowl and then turned it around and put the tenon in the chuck, and then drilled a depth hole in the center. Keeping yesterday's disasters in mind I only drilled the hole part of the way instead of the full depth; this was to give me some wiggle room in case the tenon breaks off and I have to use a mortise instead.
Sure enough, the tenon broke off just like yesterday. Why? I don't know, but it's probably due to the structure of this wood.
Due to the need to create a mortise deep enough to have plenty of supporting wood on the outside of the chuck I had to really shorten the bowl.


# 146 - 03/26/24 - Palo Verde natural edge bowl - price will be on the FB page - 4" tall by 6" wide - finished in Danish oil - numerous cracks and defects, especially in the areas of the pith - one set of cracks radiate out from the pith on one side and penetrate into the interior of the bowl - very smooth with great grain in the areas without defects. This is a bowl that didn't want to be made; it came out of the chuck twice - once with a tenon that broke off and once with a mortise that had a wall break on it - it was put onto the faceplate three separate times and the chuck three separate time, and each time a bowl is remounted it is always slightly out of true and has to be fine-tuned a little bit. The wood also caused three of my faceplate mounting screws to break off, so I had to drill holes around each one and then pull the screws out with a pair of pliers.
There was a branch that needed to be trimmed off before putting it on the lathe.
Here you can see the remains of the tenon in the chuck, as well as the holes in the top of the bowl where I had to pry out the broken screws.
Snapped it right off at the base of the bowl.
After the tenon broke off I had to remount the bowl to a faceplate and then create a mortise in the bowl, and then when this was remounted in the chuck and I began hollowing the interior again the sidewall of the mortise broke and the bowl jumped out of the chuck again.
This is the third time I had to remount the faceplate to the blank.
As I started to remove the mortise a much larger chunk of wood broke away.
I went fairly deep with the next mortise in order to provide as much sidewall support for the expansion of the chuck's jaws as possible. You can see from the photo that the jaws are barely open; this means I'm putting pressure from the jaws as evenly as possible on the sidewalls.
After hollowing and truing the outside has been completed.
Sanding is finished (at least an hour of hand sanding) and finish applied.
Here you can see an interior crack to the left side. It is one of four that penetrate from the outside in that area around the pith. The other three are not as easy to see but they can be felt.
Another view of the crack and the bowl defects (rough wood) on the upper left side.
A closeup of the cracks and rough wood on the exterior of the bowl.
Great grain.
Beginning with this bowl I'm going to start numbering them again if there is room to do so. I had previously stopped at # 10.
# 145 - 03/25/24 - Live edge mesquite bowls (in process) - I will come back to this in a few months when it has dried.
When you start with a chunk of wood you have to decide which way you are going to mount it on the lathe. Bark side toward the headstock of the lathe means you're going for a live / natural edge bowl. Bark side away from the headstock means just a typical bowl. Here I'm beginning to trim down parts of the blank to allow it to fit on the lathe.
It clears the bed of the lathe by about 1/4".
I put shellac on the bark to try to keep it in place.
Tenon turned on the bottom of the bowl and sanding sealer applied to the bowl to pop the grain a little.
Sometimes it's very difficult to remove the faceplate from the spindle, so in those situations I just use a strap, give it a quick pull and it spins off easily.
The fixture on the drill is called a Sand-O-Flex and it softens the edges of the bark which sometimes can be quite sharp.
More Shellac applied after the sanding.
Depth hole drilled.
Hollowing begins. The rim parts without bark were that way to begin with, I didn't lose any bark during the turning process.
Here you can see a section of bark starting to lift off. I used a bunch of CA glue and pressed it back down into place. When I do that I give the glue about 12 hours before I start turning again.
An example of a "first turned" bowl as opposed to a "once turned" bowl. First turned means that the wood was wet or green or fresh so the item is turned to leave about 1" thickness all around and then it is set aside to dry for weeks or months. A once turned bowl is typical wood that is already dry and it is turned from a log to a completed bowl in one step, sanded, finished, and then made available for purchase or gifting.
# 144 - Begun on 03/20/24 - Completed 04/18/24 - Mesquite bowl - twice turned - needed to dry after the first turning. Finished with Danish oil. 3.75" tall by 5.5" wide at the rim and 4.5" wide at the bottom. It has a concealed base that sits 1/8" taller than the outside rim and makes it appear that the bowl is floating off the surface. Outstanding grain and coloring. Two large cracks that are filled with black CA glue which makes it look like it was part of the natural surface.
Side to side width is 15" and I only have a 12" capacity.
I took the blank to the chainsaw and removed the branch on the one side and trimmed down the other side.
I then cut this at a about a 70/30 ratio, removing the side with the indentation. You can see in this remaining section that there are multiple bark inclusions and remnants of branches. I have yet to see if this is going to pan out.
Back to the chainsaw to trim off the 4 corners. This just make it easier when I start turning it on the lathe.
Rounded over, base established, tenon established, thick black CA glue put into the two large cracks. The upper crack keeps sucking down the glue so there's probably a very large void inside the wood. I'll let this dry overnight and then attack it again tomorrow afternoon. It this survives it will have some outstanding grain patterns. I'm already calling this my Eye Of Jupiter bowl due to all the great swirls.
Exterior has been sanded and smoothed.
Interior has been roughed out. Here you can see the streaks of black CA glue I applied to the exterior yesterday. Once this dries I won't be able to go much thinner for fear of punching through the side.
Here you can get a sense of how thick the walls and the base is when the first turning was complete.
The bowl is now much deeper and the walls are much thinner.
# 143 - 03/18/24 - Mesquite root ball - this was 15+ inches wide and I had to cut it down with the chainsaw to fit on my 12" lathe. With all the various branches/roots running through it I figured it would have some great grain if it survived the turning. Boy, was I wrong!
This is what I started with and then it shows the various stages as I cut it down.
Here I've taken it back to the chainsaw to flatten the face (top) of the bowl so I can put a faceplate on it.
I used the largest faceplate I had and I put eight long screws into it.
It *barely* cleared the bed of the lathe.
Ready to start turning.
I eventually took it off the lathe and back to the chainsaw to flatten the bottom.
After flattening the bottom I discovered rot in the center of the bowl that extended up into the bowl cavity.
Here you can see how far up inside I had to go to reach solid wood.
The outside would have looked interesting.
The normal recess is 1/4" or less. This is about 3" and you can still see the cavity extending further into the bowl.
After 2+ hours I called it quits and cut the bowl in half to see what was left of it. Not much. If I had had an Xray machine to look at it in the beginning, I might have been able to get a 4" bowl out of 15" block of wood. You win some, you lose some.
03/20/24 - From lemons to lemonade: My sister in law suggested that I make tea light candle holders from the pieces that were left so I pulled the two blocks out of the trash and set to work to see what I could do with them. I started by cutting the bottom portions off completely, leaving two relatively flat pieces, and then proceeded to drill the holes for the glass candle holder, sanded for hours to try to get the pieces as flat as possible, added a danish oil finish and then finished it with spray lacquer.
Various faces. What do you see?
The double candle holder is approx 2" tall by 7" wide by 3.5" deep. The single candle holder is approx 1.5" tall by 6.5" wide by 3" deep (depending upon which faces you are measuring from)
The crack in the front of the double candle holder does intrude into both candle cavities.

# 142 - 03/17/24 - Very small mesquite bowl - one very fine crack running through the side, but otherwise unblemished. 1.75" tall by 4" wide. Finished in danish oil.
Ha! You missed me! When the bowl split the heavy spinning part missed me and hit the ground to the right of me. You can see the rotten wood on both the portion that split off as well as the main bowl.
I took the bowl to the bandsaw, sliced off the uneven part, and the put the faceplate back on it with longer screws and it held find from that point on.
I burned two lines in it with a guitar string.
Good looking interior.
Completed.
# 141 - 03/17/24 - 04/02/24 - This was a two part process; rough turn of a wet log and then let it dry for a couple of weeks and then finish it off. Live edge mesquite with branches visible and bark inclusions.
Here you can see one of the branches that will still be visible when it's completed.
The sanding sealer brought out the yellow in the sapwood.
After reversing the bowl and preparing to hollow it out. One of the remains of a branch is visible on the side.
Again with the sanding sealer to help bring out the colors. The rough turning process was stopped here and the bowl was left to dry for a few weeks.
Picking up the process on 04/02/24.
The tenon is in the chuck to do the final turning, sanding, finishing.
# 140 - Started on 03/17/24 and completed on 04/17/24 - Tall natural edge mesquite vessel - another wet item that needed to dry for a while and then be turned again to its final shape. It is 4.75" tall by 4" wide at the rim and 4.25" wide at the base. It has a concealed base which you can see more detail of in the final photo below. When looked at from the side the vessel appears to be hovering off the surface of the counter but it's actually sitting on the base that is 1/16" tall than the outside rim, but the base is 3/4" inside of the rim's exterior dimension. The vessel is finished in 3 coats of shellac which I used to help preserve the light color of the sapwood. The base was finished with a coat of Danish oil after the signature had been applied.
I should have trimmed this on the bandsaw first, but I was lazy.
This is going to be good once it's dry and turned a second time.
I have to leave the wall thick or I will lose the bark on both sides of the bowl.
After drying for almost a month the vessel is remounted in the chuck to true up the outside. I didn't want to touch the interior too much as it would cause me to go through the side wall and I wanted to keep that bark inclusion as intact as possible.
"The best plans of mice and men" and all that jazz... as I was truing the exterior the entire section of back flew off. I'm glad I was standing off to the side when it happened as it was spinning at about 900 rpm at the time and it hit the curtain behind me with quite a thump. I should have coated the edge of the bark with CA glue, but hindsight is always 20/20.
The bark inclusion at the bottom did remain so I'm glad for that.
The part of the vessel that it actually stands on is the center section which is 1/16" taller than that of the outside rim.
# 139 - Begun on 03/15/24 and completed on 04/14/24 - Live edge mesquite - this is what we call a "twice turned" bowl; one time to get it to its basic shape (but thicker), and then we let it dry and turn it to its final shape and thickness. It sat on my air purifier for a few days to help draw the moisture out of it, and then I moved it to a shelf on my covered patio where it lost the rest of its excess moisture. The bowl is 4" tall by 5 1/8" wide at the rim and 3 1/4" wide at the base. It is finished in Danish oil.
This clearly demonstrates what is meant when we say it's a "side grain" bowl because the bowl is being turned from the bark side towards the center of the tree or branch.
That dark circle is the center of the tree/branch and is called the pith. All the growth rings surround the pith. Here, the general shape has been determined and the tenon has been turned at the base.
The bowl has been reversed, the tenon is in the jaws of the chuck, and the bowl is ready for hollowing.
Hollowed and sanded and sanding sealer applied, and now we wait for it to dry before we finish it.
These two photos were taken before the bowl was placed back on the lathe for its final turning. You can see that the depth of the bowl is pretty shallow, and in the second photo you can see how the bowl warped while it was drying; it is 5 1/4" side to side, and 5" even top to bottom. That's why the bowls are left thick in a twice-turned process; it gives you extra wood that you can remove to true up the bowl without getting it too thin. While I could have gone thinner on the final turn, I think it looks great just the way it is.
Completed bowl. The crack you see in the knothole is the only major defect in the bowl and it is extremely smooth inside and out.
I like having sapwood at the base as it allows my signature to stand out, even after the oil has been applied.
# 138 - 03/15/24 - Trashed mesquite bowl - 3.5" tall by 6" wide - finished in danish oil. This bowl has quite a bit of defective wood in it, and I noticed that early on but decided to continue with the turning to see what would become of it. As I was fine turning the bottom interior sides I tore through the sides of the bowls. You'll notice that the two tears only happened in the sections where the wood was rotten. My fault entirely. If not for the rotten wood and the resulting holes, this would have been a great bowl; great grain, good sapwood accent, partial live edge, nice bead around the rim. I went ahead and sanded it lightly and soaked it in oil. It was (is) so dry that the oil sucked into the wood as if I was pouring it into a sponge. Even now, six hours later, it feels as dry as paper.
Started with this blank.

I really debated with myself on which way I was going to turn this and settle on the bark side for the top of the bowl.
I had to slice off one corner and the bottom to get it to clear the bed of the lathe. I max out at a 12" bowl which means 5 3/4" from the spindle to the bed is a safe piece of wood.
Look close at this and you can see how rotten the wood is.
This shows how the rotten part is located within the bowl. It continues on the bottom side as well. I was concerned that it would affect the tenon so I put so much thin CA glue into the tenon that it started to smoke, at which point I opened the shop door to get more fresh air inside.
After a LOT of sanding I reversed the bowl and secured the tenon in the jaws.
After very little hollowing the tenon broke off and the bowl was cushioned by landing on my foot.
I reversed the bowl to its original position with the faceplate and created a mortise in the bottom and hoped for the best. The mortise held well and I had no further problems until I cut through those bottom edges.
I went ahead and sanded the bowl and applied oil to it. Even with oil on it you can see that it still looks dry. As I was pouring oil into the mortise where my signature is, I just watched as the oil disappeared into the pores of the wood.
# 137 - 03/13/24 - Cracked mesquite bowl - 2.75" tall by 4.75" wide - finished in danish oil. This was a very defective bowl with chainsaw cuts on the exterior and punky/rough wood on the inside. This took a lot of sanding to get it half-decent and I wasn't sure if I was even going to get it that good. Due to all the cracks and the clicking sounds when I was turning the bowl's interior I was very concerned that this was going to break apart so I kept standing out of the direct line of fire if that happened. The chainsaw marks are on the other side and I should have gotten a photo of that.
The chainsaw marks.
Even more obvious now.
The bowl is about 1/2 the height I started with.
If you look in the tenon area you can see how chewed up the wood is.
A look at the rough / chewed-up wood in the interior.
Sanded, and ready to go into the Cole jaws to remove the tenon.
The Cole jaws have little bumpers in each segment that can be placed into those screw holes you can see at the very top and the lower left side. The segments then tighten up against the rim of the bowl, holding in place while you remove the tenon, leaving you a flat base.
Completed.
# 136 - 03/13/24 - Spalted ash live edge bowl - 2.5" tall by 5.25" wide - finished only with ACKS abrasive paste & wax. I'll let this sit for a few days and if I feel it's getting too dry I'll wipe it with some danish oil. This has a wide rim because I didn't want to lose any of the bark and I brushed some shellac on the bark in an effort to keep it on the bowl. There is an indentation on on side of the bowl which is a result of the "V" shape of the blank when I first started. It's very noticeable during the turning process but it's not as obvious in the final product. There is an obvious dark line that runs horizontal on the side of the bowl as well as some black specks and lines; these are all the results of the spalting process that encompasses half of the bowl.
I started with this "V" shaped blank.
Beginning to round the bowl. The more round a blank becomes the faster you can spin it on the lathe. The faster you can spin a blank the easier it is to turn. Instead of a thunk-thunk-thunk of the tool as the blank spins at 400 rpm, you can get a bzzzzzzzzzzzzzzzzz when it's spinning up around 1,000 rpm or higher. The difference is chopping carrots versus running a hot knife through cold butter.
Here I've defined the tenon prior to developing the shape of the bowl.
The shape is well defined and you get a clear view of the indentation as well as the spalting line.
The tenon is now grasped in the jaws of the chuck. I will take a large drill bill and push it into that center hole until it reaches near the bottom of the blank. This will help me know when I'm near the bottom so that I don't hollow out too much and put a hole right through the bottom.
Hollowed out and preparing to sand and apply the ACKS paste to smooth it even more.
Completed photos. Good grain patterns.
The indentation is on the right side of the bowl below the bark and the spalt line.
# 135 - 03/13/24 - 04/02/24 Mesquite cracked bowl (rough turned on 03/13 and then second turned on 4/2) - After the initial turning the bowl was still drying. I had it sitting on top of my air purifier and it began losing weight (moisture) there for a week or so, and then it went outside on my covered patio to continue drying. Once that happened it went back on the lathe for a final turning to a thinner size; however with that large crack in the side/bottom I was not be able to go much thinner without destroying the bowl.
I started with this, but the two branch stubs on the right caused it to be greatly out of balance.
So I put the chunk on the bandsaw and trimmed those off.
Mounted on the lathe and ready to go. You can see the large crack running left to right between the two branches. This became one of those "oh well, nothing ventured nothing gained" moments so I began turning it to see what it would become.
So far so good.
Yes, that all came from this one bowl. This doesn't include everything still sitting on my bench as well as everything already sucked up by the dust collector.
That section in the lower left is going to be dicey to thin out.
Sitting in the constant air flow of the room air purifier to suck the moisture out of the bowl.
On 04/02/24 I finished the bowl with a second turn. The opening of the bowl is placed into a "jam" chuck so that I can true up the tenon which warped slightly during the drying process. After truing the tenon the bowl is reversed with the tenon placed into the chuck to finish the turning, sanding, finishing.
# 134 - 03/12/24 - Mesquite bowl - 3.75" tall by 5.25" wide - finished only with Yorkshire Grit and ACKS abrasive paste and wax. This bowl will be going to my friend Dorsey in Tucson. Dorsey is a Vietnam vet with 700+ combat missions in the F-4 Phantom II and we met through the Tour Of Honor.
This chunk of mesquite came from a neighbor's tree in November. I wasn't sure if it would be dry enough yet, but it turned out well. It does have a couple of small hairline cracks that were filled with CA glue before I started hollowing the inside.
Outside has been formed, CA glue applied to the cracks and left to dry overnight.
Hollowed out and Yorkshire Grit applied.
Reversed in the Cole jaws in order to turn off the tenon and create the final base.
Completed.
I didn't leave enough room to indicate the species... mesquite.
# 133 - 03/10/24 - Mesquite side grain bowl - 2.25" tall by 4" wide - finished in danish oil and spray lacquer. It sits on a small foot. Side grain means that when you are looking into the bowl you are looking from the bark side towards the center of the trunk or the branch.
This is a good illustration of a side grain bowl. This shows you the fibers of the wood traveling vertically through the bowl.
The dark brown circle in the side of the bowl is the pith, or the center of the tree or branch, and the growth rings surround it.
# 132 - 03/08/24 - Mesquite live edge hollow form (the inside rim is more narrow than the base) bowl - 2.75" tall by 4" wide at the inside of the rim by 5.25" at the widest part of the side - finished in danish oil and spray lacquer. Because bowls are sometimes completed before a previous project was finished, these listings are occasionally out of order.
This is the chunk I started with. Note the large branch on the right side of the log. This area was originally intended to be the base.
Note the gap where the branch used to be. It began to come loose as I started turning, so I removed it before it had a chance to remove itself at 500 rpm and smack me in the face.
Here I've rounded the blank even further, and created a mortise in the bottom. This required removing a lot of material from the bottom until I had a flat surface for the bowl to sit upon.
The bowl has been reversed and I'm preparing to hollow it out.
Off the lathe, sanded and finished with danish oil.
The following shots show the completed bowl sprayed in lacquer.
The following shots are trying to give you a perspective of the defects in the bowl causing it not to have a solid base all the way around. I did sand those defects to remove the sharp edges.


# 131 - 03/09/24 - Palo Verde bowl with multiple cracks and exposed bark on the rim finished in danish oil. 2.5" tall by 5" wide. It sits on a very short foot about 1/16" above the surface. The cracks are extensive and travel through the bowl's interior to the exterior. When blowing compressed air into the bowl there was dust coming out the other side. I saturated the interior of the bowl with half a bottle of CA glue to try to stabilize it before turning it further. I'll put more details on the photos.
I have roughly turned this to a round shape and put a mortise into the bottom of the bowl, and have begun soaking the cracks with CA glue. It now has to sit for 12 hours or more before I start turning it again, and it actually sat for close to 36 hours while I worked on bowl # 132.
I picked it back up again this morning and got the bowl fully rounded and created a final (or so I thought) shape.
After reversing the bowl and putting the chuck jaws into the mortise I began truing up the outside again and hollowing out the interior. During the hollowing the bowl was torn out of the mortise and you can see the broken rim of the mortise below.
I put a worm screw into my chuck, reversed the bowl once again and screwed it onto the screw.
While it was on the worm screw I trued up the outside once again creating the final - final shape, created a tenon instead of a mortise, sanded it to 240 and applied sanding sealer.
After the sealer had dried I applied Yorkshire Grit which is like a sandpaper paste and this smooths the surface of the wood even more.
The bowl was then reversed yet again and I completed the hollowing of the interior. This is what it looked like prior to the application of the Yorkshire Grit.
After the Yorkshire has been applied and buffed.
After the first coat of danish oil was applied and still wet.
The completed bowl after several more coats of oil.
Disregard the "mesquite" written on the bowl. It is indeed Palo Verde and I have changed it on the bowl. Just another "Senior Citizen Moment".
# 130 - 03/06/24 - Palo Verde bowl - 3" tall by 4" wide - finished in danish oil - 90 minutes from putting it on the lathe until putting the first coat of finish on it. That's about 5 times LONGER than a production turner, but it's about 5 times faster then when I first started turning. This bowl is extremely dry; I have four coats of oil on (in?) it and I'll probably need to add more tomorrow. One of the videos shows the oil soaking into the base of the bowl, and that was the *second* coat. The slope in the rim was a natural defect but I smoothed the edges with a sander to eliminate the splinters and sharp edges.
The branch I started with.
After completing the tenon on the bottom and siding the side.
Completed.

Good grain patterns. This was a sidegrain bowl which means you're going from the outside bark of one side of the branch almost to the other side and the vertical grain of the tree runs horizontally through the sides of the bowl instead of from the base up to the top of the rim.
# 129 - 03/05/24 - Mesquite flat display plate - 1" tall by 5.5" deep by 8" wide - finished in danish oil and spray lacquer. This came from the slice of wood that was removed from the log used to create bowl # 123, and it was my cousin's suggestion that I use the slice too because I had just tossed it in the trash. This shows the progression of the plate.
This is the original log. You can see the large indentation that I needed to remove.
Most of the large indentation is now gone and I can proceed to make a bowl from the remaining wood.
The bowl ( # 123) that was created.
The slice that was discarded.
This thing was a rotating guillotine at 750 rpm and I had to be very careful to not be cut by it as it spun.
The finished piece with a coat of danish oil on it.
Great grain patterns.
After a couple of coats of oil and several light sprays of lacquer.
Both sides are equally flat so the bowl (or whatever) can be displayed on the sapwood side of the heartwood side.
Various videos
# 128 - 03/02/24 - Palo Verde natural edge bowl - 3.25" tall by 5" wide - finished in danish oil. This is the most dicey, most cracked, most "likely to shatter" bowl that I've done yet. This bowl is basically held together with CA glue (superglue) and hope. Because of the starting condition of the wood I took a LOT of photos to document the process.
That branch needed to come off.
Held in place with six screws through the faceplate; I normally use four.
Semi-rounded. The discolored patches on the sides are my first applications of CA glue in the cracks that began showing up. In the right end you can see the screw holes. This is the end that becomes the open part of the bowl; that's why we don't care about the screw holes.
I'm continuing to hollow out the interior but I'm leaving some good thickness on the sides to help hold the bowl together. That vertical black streak on the left is a crack filled with black CA glue.
This is the bottom of the bowl. That crack runs rim to rim. Just a little bit of live edge showing on the right side of the bottom rim. All the discolorations are CA glue tracks.
Here you can see how the crack runs around the bowl.
The indentation in the bottom of the bowl is called a mortise. The chuck jaws fit into the mortise and then expand outwards, creating pressure that holds the bowl to the chuck. Because the crack runs all the way through, the bowl would split as soon as I created the outward pressure on the mortise. Thus, the hose clamp to hold it tight while I continued to hollow out the rest of the bowl.
Done. Successfully.
If you disregard the crack running through the middle, it does have some good grain patterns. Even after just an hour it's feeling dry so I will add more oil tomorrow.
03/01/24 - # 127 - Palo Verde pencil pot (pen holder) - 4.25" tall by 3" wide at the rim. Finished in danish oil. I left 1/2" of wood in the bottom to give it weight and stability. This is the first item in Palo Verde that I've done. I have a PV bowl in progress but it has so many cracks it may not survive.
This is the chunk of wood I started with. See the video farther below of it spinning on the lathe in an "out of round" condition.
And the final result. I suppose it could also be used to display artificial plants/flowers.
The crack in the bottom would prevent it from holding water, so no live plants.
This is what it looks like spinning at 250 rpm. When they are round and balanced I can spin them up to around 1,000 - 1,100 rpm. If it comes off the lathe at those speeds it is quite dangerous which is whyI always wear a heavy duty helmet / face shield.
The completed pot.
02/29/24 - # 126 - Ash bowl - 2.25" X 3.5" - finished in danish oil and beewax - some spalting (the dark dots/streaks) on 1/2 of the bowl. This wood came from my neighbor across the street who took down the tree last year. Since today was a special day I made two bowls.
I failed to take a photo of the beginning chunk of wood but this was after the outside was formed and then turned around and put into the chuck.
On the far side of the bowl are the dark dots / streaks of the spalting. Spalting is a fungus that attacks the tree after it has been felled and laying on the ground, and it is the very first stage of the wood molding and rotting away. Spalted wood is prized by woodturners and woodworkers for its interesting patterns.
The far side of this bowl shows the great grain patterns.
Looking down into the bowl allows you to see the advancement of the fungus. It begins with the portion of the wood closest to the ground and then moves toward the center.
I usually only date my items with the month and year.
02/29/24 - # 125 - Mesquite bowl with cracks - 2.25" x 4.75" - finished in danish oil and beeswax - The five cracks in the bowl are extremely tight and except for the one running through the sapwood are not noticeable until you look closely. This is the second bowl made from a single log; the first bowl being # 124.
The wood on the left was # 124, the smaller wood on the right became this bowl.


02/26/24 - # 124 - Holed mesquite bowl - 3.5" tall by 4.5" wide at the rim. Finished in danish oil. The holes come from knotholes that fell out during the turning. There were a lot of deep cracks in the wood to begin with which is why this piece is so small compared to the beginning wood. I also cut the blank in half because it's so difficult and dangerous for me to turn the inside of deep bowls.
The next video is just a short look at what it takes to turn a bowl. Lot's of protection from dust and flying wood.
I started with this chunk. A branch remnant and a deep hole on this side.
A large and small branch remnants on the other side.
After getting it round I saw that the cracks went deep into the wood.
I decided that it would be safer to cut this into two separate bowls so I broke out the parting tool and then the Japanese pull saw to finish it off.
Today's bowl is from the large section and I'll do the smaller one at another time.
The eventual result. It's very dry. I've put one coat of danish oil on it, but I would imagine that it's going to take several more to quench its thirst. I'll continue to add more coats over the next couple of days.
Another coat drying.

02/28/24 - # 123 - Mesquite bowl with turquoise epoxy inlays. 4" tall by 6" wide at the rim. Finished in Danish oil and beeswax.
The large indentation/hole seen in the second photo was trimmed off.
The large cracks are beginning to show. They were filled with CA glue and then left to dry.
The following day the wood was turned to a general shape and then the epoxy was applied.
The next day I began hollowing out the bowl but more cracks were found near the rim so more epoxy was applied.
I was disappointed that much of the epoxy tore out when I was turning off the excess today. I've already put four days into this and didn't feel like reapplying more epoxy in the hope that it would stay in the cracks the next time around. In addition, each time I remove the bowl from the chuck and then remount it, the bowl has to be trued up again and that's another 1/32" to 1/16" of material that needs to be removed inside and out. The cracks on the outside are already visible on the inside and if I go much thinner the bowl will likely shatter.
A look inside.
Nice figuring on the base.
A couple of side shots.
Completed bowl video
02/24/24 - # 90 - Pine bowl - 4" x 6" - finished in danish oil and beeswax. This is out of sequence because the bowl was originally roughed out back in December a few hours after the tree had been taken down and then set aside to dry.
This illustrates why I always wear a face shield. This chunk broke off and hit me in the shoulder.
Roughed out in December.
Finished in January.
02/24/24 - # 122 - Mesquite candle holder - 2.5" x 2.5" - this was actually begun several months ago (Dec?) when the wood was still quite wet. I roughed it into shape and then put it away to dry. It only warped a little bit and I was able to true the outside in just a few minutes. The inside hole had to be enlarged to accommodate the glass insert for the candle, and then a lot of sanding was required due to the remainder of the twigs that had been growing out of the branch. This is so much lighter in color due to the majority of the wood being sapwood and not heartwood. This was finished with danish oil and once again claimed by my wife for her collection.
02/23/24 - # 121 - Mesquite candle holder - 2.5" tall x 2" wide at the rim and 2.5" wide at the base. Finished with Yorkshire Grit / ACKS abrasive paste and Danish oil. This was just a broken scrap of wood from yesterday's bowl, and instead of throwing it away I used it to make a candle holder. It took a lot of hand sanding to get it to this point as there were a lot of cuts, scratches, and broken sections near the rim.
Without the candle insert.
My wife has already claimed it and added it to her collection of bowls, flower vases and candle holders.
02/22/24 - # 120 - Mesquite bowl - 4" wide by 4" tall - finished in Danish oil - several small cracks in the sides, some of which penetrate into the inside of the bowl; they aren't visible on the inside but if I shoot compressed air into the cracks you can see the dust come through into the interior of the bowl.
I started with the one on the right, but I had to trim the smaller section off due to a large crack.
After turning the outside I reversed the bowl and put the tenon into the chuck but while removing wood from the interior the tenon snapped off.
I put the faceplate back on and created a mortise instead, but due to the lack of wood to the sides of the mortise the wood cracked. I removed about an inch off the bottom to create a wider base and I created another mortise and I was able to successfully turn the rest of the bowl.


02/21/24 - # 119 - Mesquite hollow form (the inside rim diameter is smaller than the exterior dimensions) but most people would call it a bowl. Rim width = 5", widest part of the bowl is 5 1/2", base is 4 1/2", height is 3 3/4", weight is 1 lb 7 oz due to a thick bottom. Finished only in Yorkshire Grit and ACKS abrasive paste / wax.
There is a a streak of turquoise colored epoxy that was used to fill in a large crack in the side. This is an end grain bowl which means that it was cut from the top of the tree down and not from the side of the tree toward the center. When you look into the bowl you can see all the growth rings. The large light colored sections on the side of the bowl were the origins of branches.
The following photos show the step-by-step progression from raw wood to completed hollow form.
This is what I started with.
After getting it round I found that there were numerous smaller cracks and one large one. I used CA glue (commonly called Superglue) by using thin CA first to soak into the deeper fibers, then medium thickness to fill more of the gap. By applying the thin glue first it helps to pull the thicker glue deeper into the crack. Next came fresh coffee grounds pushed deeply into the glue, and then I let it set for 12 hours.
After cleaning off the exterior of the wood I was left with a firm line of coffee grounds.
The bowl needed to be reduced in size by quite a bit to eliminate the multiple small cracks and reduce the size of the large crack. The coffee sure smelled good as I reduced the size of the bowl.
I used turquoise colored Milliput two-part epoxy to fill the remaining portion of the large crack and left it to harden overnight.
The following morning I sanded off the unneeded portion of the epoxy leaving a thin line that was filling the void.
Sanded to 240, then Yorkshire Grit, then ACKS abrasive paste
Completed bowl showing the "vein" of turquoise.
Here you can see the growth rings radiating out from the center.
02/07/24 - # 117 - Fat bottomed girl.... errrr... bowl. I left this one a little thick in the base and it feels quite substantial. Finished in Yorkshire Grit and ACKS paste. 2 1/2" tall by 4 3/4" wide at the rim. No defects.
02/19/24 - # 118 - Turntable. This is just a cheap piece of pine that I made to cover the white, plastic turntable that I use to display my pieces for videos.
02/07/24 - # 116 - Cracked rim mesquite - 2 1/4" tall by 6" wide - finished in Yorkshire Grit, ACKS paste, and spray lacquer. This is for those that like their bowls with defects as it has several small cracks on the rim that were really too small to try to fill with epoxy.


02/04/24 - # 115 - Mesquite candy dish. This is just a simple straight-sided bowl that can be used for snacks, care keys, spare change, etc. I have my annual physical tomorrow so I'm giving this to my doctor. I call it Time Travel, because the grain circles in the bottom remind me of some old science fiction show where the actors walked into a whirling vortex.


02/04/24 - # 114 - A mesquite crotch, turned from the base up into the crotch figure. The end result is that you see ET's eyes when you look down into the bowl.
I had a choice of turning this from the crotch down, or from the flat side up to the crotch.
I chose from the flat side up to the crotch. When it's mounted on the lathe in this manner the side facing the camera will become the bottom of the bowl.
Because of the shape of the wood as shown above, the end result has dips in the rim.
There's some glare from the flash, but you should be able to see ET's eyes.


02/04/24 - # 113 - A cracked mesquite bowl. Most of my peers told me not to do it, that it was too dangerous. Nothing ventured... nothing gained.
This is what I started with, and everyone said "Don't do it"!
So far, so good.
The cracks were filled with turquoise Milliput and left to harden for 18 hours.
I began turning away the excess Milliput and sanding the bowl.
The final outcome. I'm actually quite proud of myself with this one.


02/03/24 - # 112 - Pine bowl - this was from a piece of wood that had been drying for over three years, but in the end it was only good for firewood. This would have been the largest bowl I have turned.


02/02/24 - # 111 - Mesquite flower vase with turquoise accents - 6 1/2" tall by 3 1/2" wide at the base and 3 3/8" wide at the top - sanded to 400 and finished in Yorkshire Grit, ACKS abrasive paste, and MinWax. Turquoise accents are Milliput used to fill cracks.
When I started with this my intention was to just do a side grain bowl.
But due to all the cracks in the wood I had to cut away a lot of worthless timber and it took on an elongated shape so I decided to make a flower vase out of it. I used Turquoise Milliput to fill some cracks and left it on 02/01 to finish the following day.
Note the thickness of the top rim in the above photo and then note the thinness in the below photo. As I was starting to thin the top a large section broke away and had to both narrow the width and the thickness of the rim to eliminate any traces of that damage. In the end, I think it looks better with the thin top.
Various shots showing the grain and the turquoise "veins".
Close-up shots showing the thinness of the top rim and the turquoise.
02/01/24 - # 110 - Ash bowl with side defect - finished in Yorkshire Grit and a very light coat of danish oil - I may go back and spray this one with laquer - 2 1/4" tall by 3 1/4" wide. This wasn't really difficult, but it was very time consuming. The bowl was turned in under an hour, but it took 2+ hours to hand sand and finish it. I relieved all the sharp points and edges during the finishing process.
These are videos I took during the sanding process. Due to the gap in the side of the bowl you can see my fingers inside as the bowl spins.
These are some in-process photos. I like interesting character in my pieces so I don't look for "perfect" wood to start a project with. This had a large branch wrapped around a smaller branch.
After doing the initial shaping you can see the hole beginning to show itself.
The small circular area in the middle is actually a depression in the wood. If I had thinned the side more the depression would have gone away so I stopped at this point so that it could still be felt.
The black specks are spalting.
This is the other side of the bowl opposite the depression. That center piece in the gap would eventually go away.
After the initial shaping and time to turn it around and work on the interior.
The center piece of the gap went away at this point.
After hours of sanding this is the result.
My wife said that it looked and felt "dry" so I gave it a couple coats of lacquer. I agree with her that it now looks a lot better.
01/31/24 - # 109 - Ash lidded container - 4 1/2" tall and 2 1/4" wide - finished in Yorkshire Grit and ACKS abrasive paste & wax.
01/31/24 - # 108 - A tiny bowl - 1 1/2" tall by 2" wide - finished with Yorkshire Grit - I had a small scrap of wood and decided to see what I could do with it. The quarter is there to give you something to compare the size to.
01/30/24 - # 107 - Ash bowl with a defect in the side - 2" tall by 4" wide - finished in Yorkshire Grit and ACKS abrasive paste & wax.
I started with this...
And ended with this...
01/30/24 - # 106 - Ash bowl with a wavy rim and spalting - 1 1/8" tall by 4 3/8" wide - finished in Yorkshire Grit and ACKS abrasive paste & wax.
I started with this...
And ended with this...
01/29/24 - # 105 - Ash bowl with a dip in the rim and a very small bead at the rim - finished in Yorkshire Grit and ACKS abrasive paste & wax - 2 1/2" tall by 4" at the widest point. End grain bowl.
01/29/24 - # 104 - Small ash bowl - 1 5/8" tall and 3 1/2" wide - finished only in Yorkshire Grit and ACKS abrasive paste & wax.
01/28/24 - # 103 - Ash vase - 5" tall by 3 1/2" wide at the base and 2 3/4" wide at the top - finished with Yorkshire Grit and ACKS Abrasive Past & Wax - I don't like the looks of the wood at the top but there's nothing that can be done about it - the hole in the bottom is due to the point of the drill poking through but since this a vase with a plastic tube insert it's of no consequence - if I had made the vase 1/4" taller it would not have been an issue... lesson learned. This is another vase that my wife has laid claim to.
The branch I started with.
And the final outcome. Nice grain.
The black specks are called spalting and it is created by a fungus that begins the process of causing the wood to rot. A more heavily spalted branch would be more desirable in the woodturning world, but there's a fine line between a beautiful, heavily spalted object and a piece of wood that has gotten so "punky" that it just falls apart. You never know what you're going to get once you start turning the wood.
More nice grain.
01/28/24 - # 102 - Ash with a narrow base, a dip in the rim, and two sloping sides. The shape is determined by the shape of the wood when I start. Because of the shape this required several hours of hand sanding. It is finished in Yorkshire Grit and beeswax. It is 2 1/4" tall at the highest point and 5" at the widest point. This has great looking grain patterns.
This image really illustrates just how steep the sloped sides are.
01/27/24 - # 101 - Ash bowl with wavy rim and spalting - 1 3/4" tall by 4 3/4" wide at the rim - knothole in the bottom of the bowl - finished only with Yorkshire Grit.
The wood I started with.
Heavy spalting on one side of the bowl, and a wavy rim due to the shape of the beginning wood.
01/24/24 - # 100 - spalted Ash - 3 1/4" tall by 4 1/2" wide at the rim - finished only in Yorkshire Grit and ACKS polishing paste and wax. This will be a keeper. Spalting is a form of fungus and it creates the dark streaks that you see in the darker portions of the wood. Left too long and the spalting will rot the timber. The color change between the dark and the light wood is due to the darker being heartwood - closer to the center of the tree and older wood, and the light wood is sapwood that is closer to the bark. As the name implies, the sapwood carries more of the nutrients up the tree. In the middle of the sapwood is a very small knothole from a branch that I decided to keep in the bowl.


01/23/24 - # 99 - Mesquite bowl - 3" tall by 4" wide at the rim - finished only with Yorkshire Grit and ACKS abrasive polish and wax.


01/23/24 - # 98 - Mesquite vase with inlay - 11" tall by 2 3/4" wide at the base and 1 1/4" wide at the top - sanded to 400, finished only with Yorkshire Grit and ACKS abrasive paste and wax. It holds a 5" tube so live plants and water can be used.
The vase had a longitudinal crack that I filled with thin CA glue followed by medium CA, followed by black thick CA. The thin penetrates deeply into the fibers of the wood and helps to pull the medium deeper into the crack, and then the thick black creates an accent line in the wood. The white blotches you see are from the CA glue accelerator which helps it to cure quickly.
I let this site for about 18 hours and then began turning again. Once the vase was rounded the crack was still visible so I used a product called Milliput to further seal it. Milliput is similar to Silly Putty in how you apply it, but it's a two-part product and it gets hard as a rock after 3-4 hours.
It took a lot more turning and a LOT more sanding at 60 grit to get all the remnants of the Milliput off the surface of the wood.
Eventually it all came off and I was left with a "vein" of turquoise running through the wood. Like the others, my wife has claimed this for herself.
# 97 - Mesquite flower vase - 6 1/2" tall - one side is cut naturally cut away - finished in danish oil.
Note in the next three images how the side is sliced in. This was a natural curve in the wood that I just sanded well.
I have now made three vases and my wife has claimed them all. :-)
01/21/24 - # 96 - Ash flower vase - 4 1/2" tall - finished in Teak oil in an effort to darken it up just a little. It does not have a plastic insert to hold water because my inserts are 4 3/4" inches tall so this will be used only with artificial flowers.
01/20/24 - # 95 - Mesquite cup/mug - 4" by 4" - Danish oil - while it could certainly be considered a bowl, it has more of the makings of a large mug.
12/19/24 - # 94 - Mesquite bowl with a slanted side - 1 3/4" tall by 5 1/2" wide at the rim - Danish oil - note the wedge shape on one side, this is due to the shape of the wood when I started - this was the second bowl of the day - six months ago it would have taken me all day to do one.
12/19/24 - # 93 - Mesquite - this is the second cut-off from the 91 and 92 bowls - 3 1/2" tall by 4 1/2" wide at the rim. Danish oil.
The chunk of wood before I started. I trimmed off the longer part on the left before I started turning it.
12/18/24 - # 92 - Mesquite - 3 1/2" tall by 4 1/2" wide at the rim. Finished in Danish oil - like yesterday's bowl, it has great grain and color, probably because it came from the exact same piece of wood. :-)
Inside contour matches the outside.
Both came from the same block of wood. Today's bowl was made from the piece cut off from yesterday.
12/17/24 - # 91 Mesquite bowl - 2 1/4" tall by 7" wide at the rim - great color and grain - this bowl shape really calls for a thin bowl, but the wood has a crack running through the middle of it from rim to rim and I didn't want to risk making it too thin and having the bowl shatter.
In this image you can see the crack at the 12 o'clock position and it runs down through the middle of the bowl to the rim on the other side.
I took this photo of the outside while it was still on the lathe in case it later broke. It was looking great at this point.
01/16/24 - # 89 - This was intended to be a revision of # 88 to remove the small cracks near the bottom of the piece, but the cracks, although thin, went far deeper than expected and I wound up putting holes in the side of the bowl and eventually causing the upper and lower sections of the bowl to separate. This was entirely my fault and I should have just left it as is.
I then continued to work on the lower portion and made a very small dish/bowl from the remains. It stands 1 1/8" tall by 3 3/8" wide and weighs a whopping 1.3 ounces. It's shape is reminiscent of a sauce bowl you might be served at an Asian restaurant.
After the separation of the two parts I finished turning the small bowl, and then I smoothed the side and bottom of the upper ring. I will research how to attach another wood to the bottom of this existing ring in order to make a complete bowl, but that may take some time.
01/15/23 - # 88 - Mesquite bowl - knothole defect - 3" tall by 5" wide at the rim - danish oil. Another bowl that started out about twice as tall but numerous cracks resulted in me cutting it in half. There are two small "smiling" cracks toward the bottom and one knot that results in a small hole on the exterior. The grain and deep, dark color on this one is very good.
01/13/24 - # 87 - Mesquite bowl - 2 3/4" tall by 4" wide at the rim - finished in danish oil. This one started out as tall and wide but numerous cracks in the side forced me to turn it down to tall and thin. It became too difficult for me to hollow out the interior so I cut it in half and just focused on the lower half. The exterior of the bowl is just so-so, but the interior color and grain is gorgeous. This will be going to a family friend for her birthday next week.


01/12/24 - # 85 - Pine bowl - 4 1/2" tall by 6" wide at the rim. This bowl is out of order because I began work on it on the 9th, 3 hours after the tree was cut down, and I had "issues". This will be a long post with a lot of photos and explanations. I'll start with the completed video and then you can see all the steps taken to get there.
After completing the turning of the bowl's exterior I reversed in the chuck and began working on the interior. I had a hard "catch" which caused the bowl to rip itself out of the chuck's jaws leaving the tenon behind inside the jaws.
The catch was at the 12 o'clock position where the large knot is.
As I mentioned earlier, the bowl had been part of a standing tree just three hours earlier and was still extremely wet and the wood fibers were not strong at all. I proceeded to dry the bowl in the microwave for a total of 15 minutes in 1 to 3 minute intervals with long cooling down periods between drying. Surprisingly, the bowl only lost about 1 ounce of water during the drying process. I use a postal scale to weigh the bowls during drying sessions; when the bowl stops losing weight I know it's as dry as it's going to get at that time.
Because I had turned this bowl while it was still wet (high internal moisture content), as it dried it lost its round shape and became slightly oval which is entirely natural for wood to do. In the two following photos you can see how the vertical portions of the bowl are longer than the horizontal portions are wide. The dimensions at this point were about 6 1/4" by 6". The recess in the bottom of the bowl is called a mortise and a set of jaws are expanded into this space to hold the bowl on the lathe as it spins.
When the bowl was remounted you could easily see how the top and bottom are touching the face of the jaws but the sides were not. This also meant that the mortise on the bottom of the bowl was also oval and needed to be recut to make it circular.
The mortise has been recut into the bottom, the bowl is remounted in the jaws, and now the exterior of the bowl needs to be re-trued due to its oval shape. This will ultimately result in the top of the rim being more narrow on two sides than it is on the other two sides. The tailstock on the right is extended into the cavity of the bowl in the event that the bowl shatters; hopefully it will help to keep the bowl from flying off the lathe at 750+ rpm and hitting me in the face.
At this point I was still working on trueing the bowl's exterior and the bowl's wall was beginning to get thin. I was at 850+ rpm when the bowl cracked and it sounded like a .22 caliber rifle being shot. I shut off the lathe and took a look, decided that the crack probably wasn't going to get much larger and proceeded to start turning again, but with a lot less side pressure on the bowl's wall.
Fresh pine leaves a big mess behind.
In this photo I'm about to begin working on the interior. This shot illustrates what I mentioned earlier about the rim thickness. You can see that it is very thin at the lower left and much thicker at the upper right. The goal here is to get the interior from an oval to a round shape to match the exterior, but without shattering the rim.
These next three shots show the completed bowl. It has one major defect near the top of the interior rim, but the only way to eliminate it would have been to remove the top 1/2" of the bowl, or more, and I wanted to keep the height if possible.
Here you can see the defect from the 9 o'clock position to about the 12 o'clock position.
My neighbors across the street had one of their trees cut down and graciously allowed me to have some of the timber, so this bowl was a thank-you to them.
01/11/24 - #86 - A mesquite bowl for a former co-worker's birthday.
01/08/24 - # 84 - finished only in beeswax - 2 1/2" tall by 4 1/2" wide at the rim - numerous cracks - thick wall due to the cracks.
01/08/23 - # 83 - Ash bowl - burned rim band - natural indentation near the bottom. 3" tall by 3 1/4" wide at the rim. Finished in Danish oil. The burned detail was created by making a small groove and then holding a guitar string in the slot until friction caused the wood to char.
01/07/24 - # 81 - ash vase - 6 1/4" tall x 2 1/4" wide at the base. It has a plastic insert to accommodate the watering of live flowers.
The photos are in reverse order from completion to raw wood so read the descriptions at the bottom of this item and work your way back up.
Side 1
Side 2
Side 1
And so, a vase was created.
Giving in the the inevitable, I cut the upper section off and just focused on the lower section. It was at about this point where the wood said "make a vase out of me".
Even cutting the tip off didn't help a lot. As you can see here it's almost two separate turnings.
I cut the upper tip off to make it a little more straight.
I tried it this way first but it turned in an arc so that wasn't going to work.
After removing the stuff around the base and the spiky stuff on the sides.
This was the spike I started with.
01/03/24 - test for water containment. A friend had asked how waterproof the bowls were, so I filled this with water and left it for 24+ hours. It didn't leak a drop. The tannins in the wood did leach out and the water was discolored when I poured it out.
01/02/24 - # 80 - Ash bowl - artistic - 3" tall by 4 1/4" wide at the rim - large hole and bark inclusions - finished with danish oil. This was a tough one and it took about 3 hours, but I can remember back to when I first started turning and it would take me 8 hours+ just to do one normal average-sized bowl.
Fortunately, I was standing off to the side as I was turning so this just barely brushed my sleeve and hit the curtain below me and then fell to the ground. That's why I always wear a helmet/face shield when turning. It was lightweight due to being rotten wood, but coming off the lathe at 600+ RPM will still sting.
How it looked when the outside was done and I reversed it in the chuck. Now you see it...
Now you don't.
When I began turning the interior I got too close to the outside edge which caused the rim to separate. I should have planned this out better so that the rim stayed connected and it just had the big hole underneath.
Looking at it from the other side.
I queried the members of my woodturning group and most agreed with me not to go deeper. If I had gone deeper to make a thinner bottom it would have joined the upper and lower defects into one large hole and the bowl may have shattered at that point.
# 79 - Ash pencil pot - 4" tall by 2 1/4" wide at the rim - I left 1/2" of wood in the bottom to help give it stability. My wife and I have dental appointments on Wednesday so I'll give this to the front desk for them to put their clean pens into. Maybe the hygenist will go easy on me that day. The pot pulled out of the chuck as I was removing the bottom tenon so there are some small scars near the top but I'm not going to worry about it.
January 1, 2024
# 78 - Ash - very small bowl with a hole through the bottom - 1 3/4" tall by 3" wide - straight sides and a flat bottom - finished in danish oil. This is strictly a decorative piece.


12/31/23 - # 77 - Final bowl of 2023 - Ash - 2" tall by 3 3/4" wide - finished in Danish oil. Natural holes through the center - great grain.
12/31/23 - # 76 - Ash bowl - 3 1/4" tall by 3 3/4" wide at the rim by 4 1/4" wide at the bulge. This is referred to as a "hollow form" because the rim opening is more narrow than the widest part of the bowl.
12/29/23 - # 75 - Mesquite bowl - 3" by 6". This is the last one from the log that was shown above on 12/17/23. I think the next batch will come from the "smalls" that I have set aside.
# 74 - Mesquite candy bowl - 2 1/4" tall by 5 3/4" wide - finished with Danish oil. It developed a crack in the wall prior to sanding the interior so the inside is not as smooth as the glassy wall smoothness of the exterior.
I went to YouTube this morning and one of my own bowls was the first thing listed in the Shorts category.
12/27/23 - # 73 - Mesquite bowl with banded rim. 3" tall by 6" across at the rim.
12/24/23 - # 72 - Mesquite popcorn bowl - 4" tall by 6" wide at the rim. It will hold 1/2 bag of microwave popcorn. Finished with Danish oil so it's food safe.
12/24/23 - The bowls for the neighbors are snuggled securely in their gift bags awaiting delivery by Santa "Turner" late tonight, and I still have more left over, but these are mostly the smaller items.
12/23/23 - # 71 - Footed mesquite bowl. 2 3/4" tall by 6" wide. Sanded to 400, sanding sealer, Yorkshire Grit, ACKS polish, Danish oil, wool buff; it's as smooth as a baby's butt. I don't normally do the exposed foot like this but I'm trying new things. This has great grain patterns.
12/22/23 - Video and a couple of stills from my training class a few nights ago.
I was asked about my dust collection, so here are a few photos and an explanation. I have a dust collection port behind my lathe in the top of the bench. It goes from there via a 4" hose to a first stage separator where the majority of the chips and dust will wind up. Anything that makes it past that will go the actual dust collector where it wind up in the fabric collection bag.
Dust collection port behind the lathe.
View from under the table. The vacuum hose connects to this port.
The hose travels under the table top and then goes up the wall.
The hose then connects with the main hose which goes to the dust collector. There is a floor receptacle branch (sweep dust into it) and a bandsaw branch off the main line. Each branch has a "blast gate" that can be opened or closed to allow vacuum at that specific area or machine. Having all blast gates open at the same time means you will have minimal air flow which is why you want that air flow coming from the machine that is currently in operation.
The main hose travels to the dust collector itself which is the green machine with the yellow band around the top. The two bags on the right side are the dust collection bags. The black bucket in the back with the white PVC tubes is the first stage separator; it will keep 90%+ of all the chips in that bucket. If you look at the bottom fabric bag on the collector you will see a crease about 1/4 of the way from the bottom. That's the level of the dust in that bag, yet the black bucker is about 90% full at this point.

The dust enters the separator through the tubes on the left hand side. After dropping the majority of the chips and dust inside the bucket the remaining fine dust will exit through the center port that has all the dust inside the rim. That travels via a flexible hose that you see in the prior photo to the dust collector.

This shows the underside of the lid and all the accumulated chips and dust. When the dust enters the bucket it does so in a cyclonic manner, spinning around the interior of the bucket until it loses velocity and drops to the bottom. The vertical pipe in the middle then picks up any stray dust still floating around and sends it to the dust collector and thus to the dust collector fabric bag. The bag only filters down to 2 microns but I can't currently afford a cartridge filter to replace it which will filter to 1 micron or less. If I did not have this first stage separator I would be emptying that fabric bag at least monthly, if not more often. This will be only the second time I've emptied it since I began turning in May, and it's my first time to empty the bucket.

This is the chips and dust from today's (12/22/23) bowl turning. This is ONLY what landed on the floor; it does not include everything the dust collector vacuumed up, everything still laying on top of the bench or the saw or the portable tool caddy, or.... This is why I wear a dust mask 100% of the time when turning, not just when I'm sanding.

12/22/23 - Wide rimmed mesquite bowl. Finished with Danish oil. 3 1/4" tall by 6" wide.
This chunk of wood broke off and hit me in the shoulder while I was turning the blank.
12/21/23 - Live edge mesquite bowl. 2 1/2" x 3 3/4". Danish oil.
12/20/23 - I knocked this one out after dinner. Small mesquite bowl finished with danish oil. The dark ring at the top just below the band is created by making a small groove in the wood with one of my tools, and then a piece of guitar string is held tightly to that groove until the friction with the metal string burns a line into the wood. It's small; 2 3/8" by 4" at the rim. I have lots of small pieces of wood and once they are rounded off this is a typical result when I'm done.


12/19/23
I attended a bowl turning class this even and rough turned a bowl from Poplar; my first time with that wood. I'll put this on my own lathe in the next few days finish the turning but you can already see that the grain is going to look good once a finish is applied.
12/20/23 - the refined bowl. Poplar. 4" tall by 4 1/4" wide at the rim. Finished with Danish oil and beeswax. Compare this video and the photos to yesterday's. There is a lot of green in the grain but I don't know if it shows that well in the photos.
12/17/23 Mesquite "Chimenea" style bowl. 4" tall by 4 1/4" wide at the rim and 5 1/2" wide at the bottom bulge.
The final product
The electrical tape helps to hold the bowl onto the Cole Jaws while I remove the tenon from the bottom.
This was right after the outside had been turned, sanded, and finished.
Bowls come from "blanks" which are typically created on the bandsaw.
But before the bandsaw you have to rough cut the blanks from a log with a chainsaw.
And all those smaller blanks came from this single log.
12/15/23 #65 "Third time is the charm"
This will be longer than most posts and will have several photos.
I started with this block of wood.

I refined the outside, sanded and finished it.

I reversed it in the chuck and began redoing the outside contours to something else when the tenon broke.
I remounted it onto the faceplate and began shaping it again. There were cracks near the rim (the area closest to the faceplate so I decided to turn those away and just have a shorter bowl. I had just watched a training video on the Dublin Viking Bowl so I decided to pursue that look.
Once I had the look I wanted I reversed the bowl into the chuck once again, hollowed it out, and then sanded and finished the bowl. I removed it from the chuck, reversed it and placed it into the cole jaws so I could remove the tenon. During that process it popped out of the jaws and I was unable to catch it before it hit the ground and broke.
Fortunately I had barely begun to remove the tenon so once again I reversed the bowl and held it with the chuck so I could resolve the broken rim and then yet again reversed the bowl and put it back in the cole jaws to finally (hopefully) remove the tenon.
Success. The final dimensions are 3" tall by 6" wide. It is mesquite and finished in danish oil and beeswax.
The actual Dublin Viking bowl, circa 1000 AD.
Video of the completed bowl.
# 64 A tiny, thin-walled cup. Mesquite. 1 3/4" tall x 2 5/8" wide at the rim. Weighs 0.8 oz. Wall thickness is 5/32".
# 63 Shallow straight-walled bowl with great coloring although the flash washed some of it out.
1 1/2" x 5 1/2". Mesquite
12/11/23 # 62 shallow curved interior. 2" x 5". Mesquite
The line below the bark inclusion is the beginning of a crack.
# 61 Second bowl of the day from the same wood.
This bowl has a recessed foot that makes it appear that the bowl is resting on the shelf, but the bowl edge is about 1/32 above the surface.
A view of the bottom. The actual foot is the ring that is between my signature and the outside edge of the bowl.
12/10/23 # 60
Live edge mesquite from the same wood as the previous bowl. This is 3" tall by 5" wide. It has a small cove near the bottom and a small band near the rim. Can you spot the mistake that I should have caught before finishing the bowl?
12/09/23
Today I'll walk you through some of the steps to make a bowl. This is mesquite and the final dimensions are 3 1/4" tall by 4 3/4" wide at the rim. Final video is at the bottom of these photos.
1. Start with a log. This will produce well over six bowls of various sizes.
2. Cut it into bite size pieces. My lathe can turn a blank of wood up to a maximum of 12" in width.
3. Once you have them down to a reasonable size you can further trim them on the bandsaw and make them round-ish.
4. Mount it to the lathe and turn it until you have the desired shape. You have to stop periodically to see if you still have flat spots on the blank that need to be removed by continuing to turn the wood smaller.


5. Once you have reached the desired exterior shape, you sand it, apply sanding sealer, apply abrasive paste, then a finish. I use Danish oil followed by beeswax on almost everything I make. Both of those items are food safe.
6. The bowl is then turned around and the base of the bowl is held in the jaws of the chuck. The interior of the bowl is hollowed out, and then all the above sanding / finishing steps take place.
7. Once the interior is done the bowl is reversed once again and placed into something called Cole Jaws. This is a large plate with bumpers on it that can be contracted or expanded to hold the bowl in place by the rim alone. The bottom tenon of the bowl is removed so that the bowl will only sit on its own foot. That area in the center of the bowl bottom exterior is sanded clean, signed, and then the final finish applied to that area.
8. And "Ta-Da"! The bowl is finished.
December 2023
Tall and short acacia tea light candle holders. Both pieces came from the same section of wood.
Short holder 3" x 2 1/4"
3 projects today. This took the longest, and it's the smallest, and it's also my favorite. I really like the shape. You never know what's going to be hiding inside a piece of wood. This is mesquite and it is 1" high and 4" across.
This is also mesquite. It has a sloping rim.
This is ash.
I started with these at 11 am.
And finished with these at 4 pm.
Another look at my favorite.
Not a good day today; 5 attempts and only one successful item, a very small spalted eucalyptus bowl that is 1" high in the back and 2 1/2" wide at the rim.
A very small mesquite bowl. 1" x 4".
The three items produced today.
I'm not sure what to call this... a bowl, a partial bowl, a partial winged bowl, a partial winged offset bowl? Mesquite.
A tall end-grain turned mesquite bowl.
A shorter cross-grain turned mesquite bowl made from the same piece of wood as the previous tall bowl.
Two mesquite bowls from the same piece of wood. 2 1/2" x 8' and 2 3/4" by 7". Both finished in danish oil and beeswax. The first is the taller one.
And now the shorter one.
And both.


November 2023
In 2015 a 1000+ year old Viking bowl was found during an excavation in Dublin, Ireland. This was my take on it. The photo of my bowl was selected as the cover photo for a FB group that I belong to for people with Essential Tremor that do "artistic" things. I was quite honored. This bowl was gifted to a good friend of Irish descent that is a first generation American to be displayed in his new home in Texas.


This is an example of an item turned "wet" or "green". This wood was within a live tree less than a week prior to this photo. When wood is fresh, or wet, or green it contains a great amount of moisture and that moisture must be allowed to leave the wood SLOWLY, so after turning this tea light candle holder on the lathe I slathered it in Anchor Seal and set it on a shelf outside to stabilize. I want the moisture content to get to the point where it is no longer dropping. If I did not seal the wood in this manner it is likely to dry too quickly and the internal stresses on the wood will cause it to crack in numerous places.
This is my largest item to date. It is roughly 7" tall and 7" around at the widest point. It is not completely hollow inside as I don't have the tools or experience to do this safely.
This is a spare change holder for the cupholder receptacle in a friend's truck's center console. The inside is dished and not hollowed out to allow the user to easily grasp the loose coins.
I decided that I needed a decent woodworking mallet so I made one. This is it compared to the first one I made in class six months prior.
Updated 11/18/23 with some Wood Bowl Finish.
This is Eucalyptus and the lines / discoloration inside is a desired feature called Spalting. Spalting will typically happen when a log has been laying on the ground for an extended period of time. This wood had been down for 3.5 years when I turned it. Spalting is a fungus and the lines are basically the fortress walls to protect the organisms within that area from other organisms building their own colonies elsewhere within the wood. Spalting is an early predecessor to the wood rotting away.
This next one is my first work in Acacia and also my first non-functional bowl. It came out the way it did due to the structure of the log that I started with. As I began hollowing out the center of the bowl there was nothing to hollow out on two sides of the item so you just see empty spaces. This item took the better part of 4 days to complete due to the amount of time required for hand sanding as well as letting each coat of finish dry for 12+ hours.
The collection varies as I do tend to give some things away but this is the current inventory as of Nov 14th.
This is an EDC (Every Day Carry) container. You can use it for toothpicks, matches, meds, or anything else you want to carry with you each day. This is made from spalted Eucalyptus. 3.25" long x 1" thick.
The concept came from a YouTube channel called Worth The Effort and I attempted to copy his template.

Eucalyptus bowl. 2"H x 5"W. Spalted. Curved interior. There were so many cracks in this I fully expected the bowl to shatter into a number of pieces while I was turning it.
2nd Eucalyptus toothpick holder. Slightly shorter and thinner.
Acacia bowl. 4" x 1.5" Finished with Danish oil and beeswax.
Before you can start to turn a bowl you have to prep the "blank" so I spent some time on the bandsaw today preparing blanks; both Eucalyptus and Acacia. The acacia bowl shown above came from the small half-log in the front center of the photo.

My 40th project since I took my first class in May 2023. This is also the first plate I've attempted. It is made in Acacia and is 7" across and 1" high at the rim. This first shot is of the bottom showing the 1/8" deep mortise (recess) that the jaws of the chuck expand into, holding the plate on the lathe.

Partial live edge Acacia bowl. 4.25" x 2.25". The foot is recessed into the bottom of the bowl so the bowl sits 1/8" above the surface but looks like the bowl is sitting on its rim.
Two small bowls - 2 7/8" x 1 3/4" and 2 7/8" x 2 3/8" that I turned as Thank-You gifts for the woman that gave me the wood from the tree she was having removed. I have large blanks drying but they won't be ready until next fall, and I'll make her some larger items for next Christmas. The first two bowls arrived at her house on her birthday, so good (inadvertent) timing on my part.
This one was quite a challenge and took me four days to complete due to breakage and having to re-sand the interior when I found rough sections during the finishing process.
Although the previous bowl took me four days, this one took about 8 hours and I think it's my best quality bowl yet; the surfaces are as smooth as glass. It too will be going to Texas as another housewarming gift for a good friend.
Acacia, finished in Danish oil and beeswax. 4 hours from start to finish. The foot is recessed into the bottom to make it appear as if the bowl is sitting on the surface but it's really just the foot. 2.5" x 4.5".
This shows the recessed foot of the bowl.
October 2023These next two bowls were made from opposing sides of the same branch. They both have two worm holes in their side.
Another example of a lidded container.
This bowl blank had a severe angle to the wood so that's how I turned it.
This little dish is about 1/4" tall and about 2" across. It would be good for use as a coaster.
This is a drill handle that I created. I use it to create a hole in the center of the bowl to the depth that I want to hollow out the bowl. This way I know that when the hole is gone that I'm very close to the bottom of the wood.
Another very small, very short, very thin dish or coaster.
September 2023
This is called a "lidded" box or container.
An estate sale bowl that I purchased and then revised.
Another revised estate sale bowl.
Another revised estate sale bowl. This one only needed some minor cleaning.
June 2023
When the bark or remnants of the bark are showing it is called a "live edge".
May 2023
The mallet created in my very first class.

The bowl created in my second class. This image is of the bowl after I refinished it at home.


.MP~2.jpg)


.MP.jpg)


.MP~2.jpg)

.MP~2.jpg)
.MP~2.jpg)

.jpg)

.jpg)


.jpg)
.jpg)
.jpg)
.jpg)
.jpg)


.jpg)
.jpg)


.jpg)


.jpg)
.jpg)
.jpg)
.jpg)

.jpg)
.jpg)
.jpg)
.jpg)
.jpg)


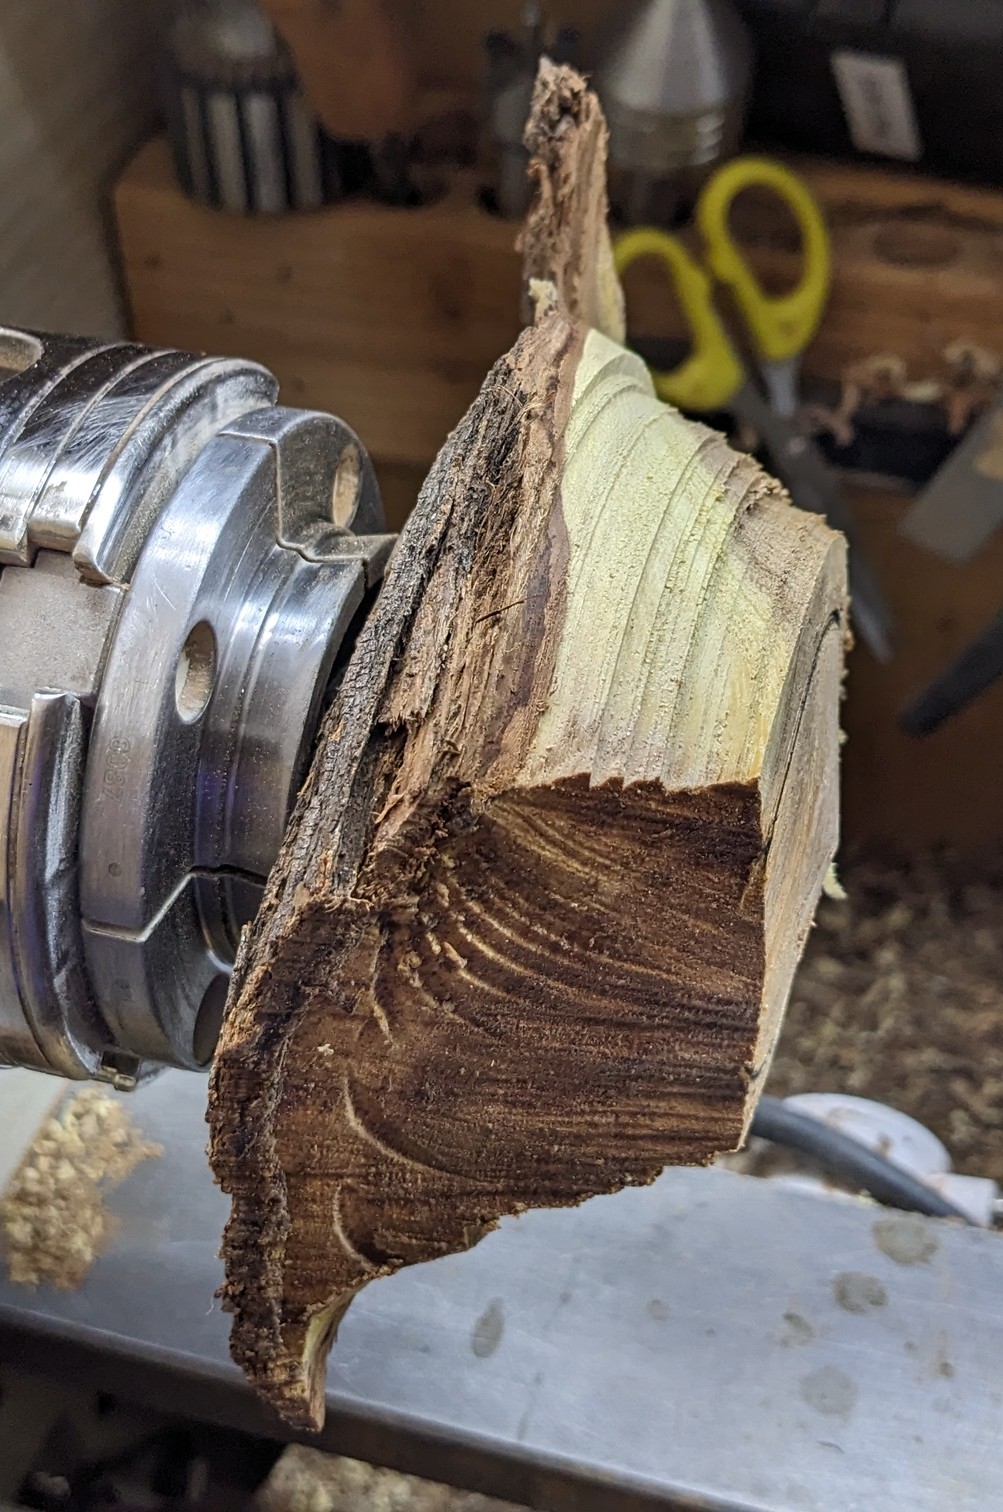


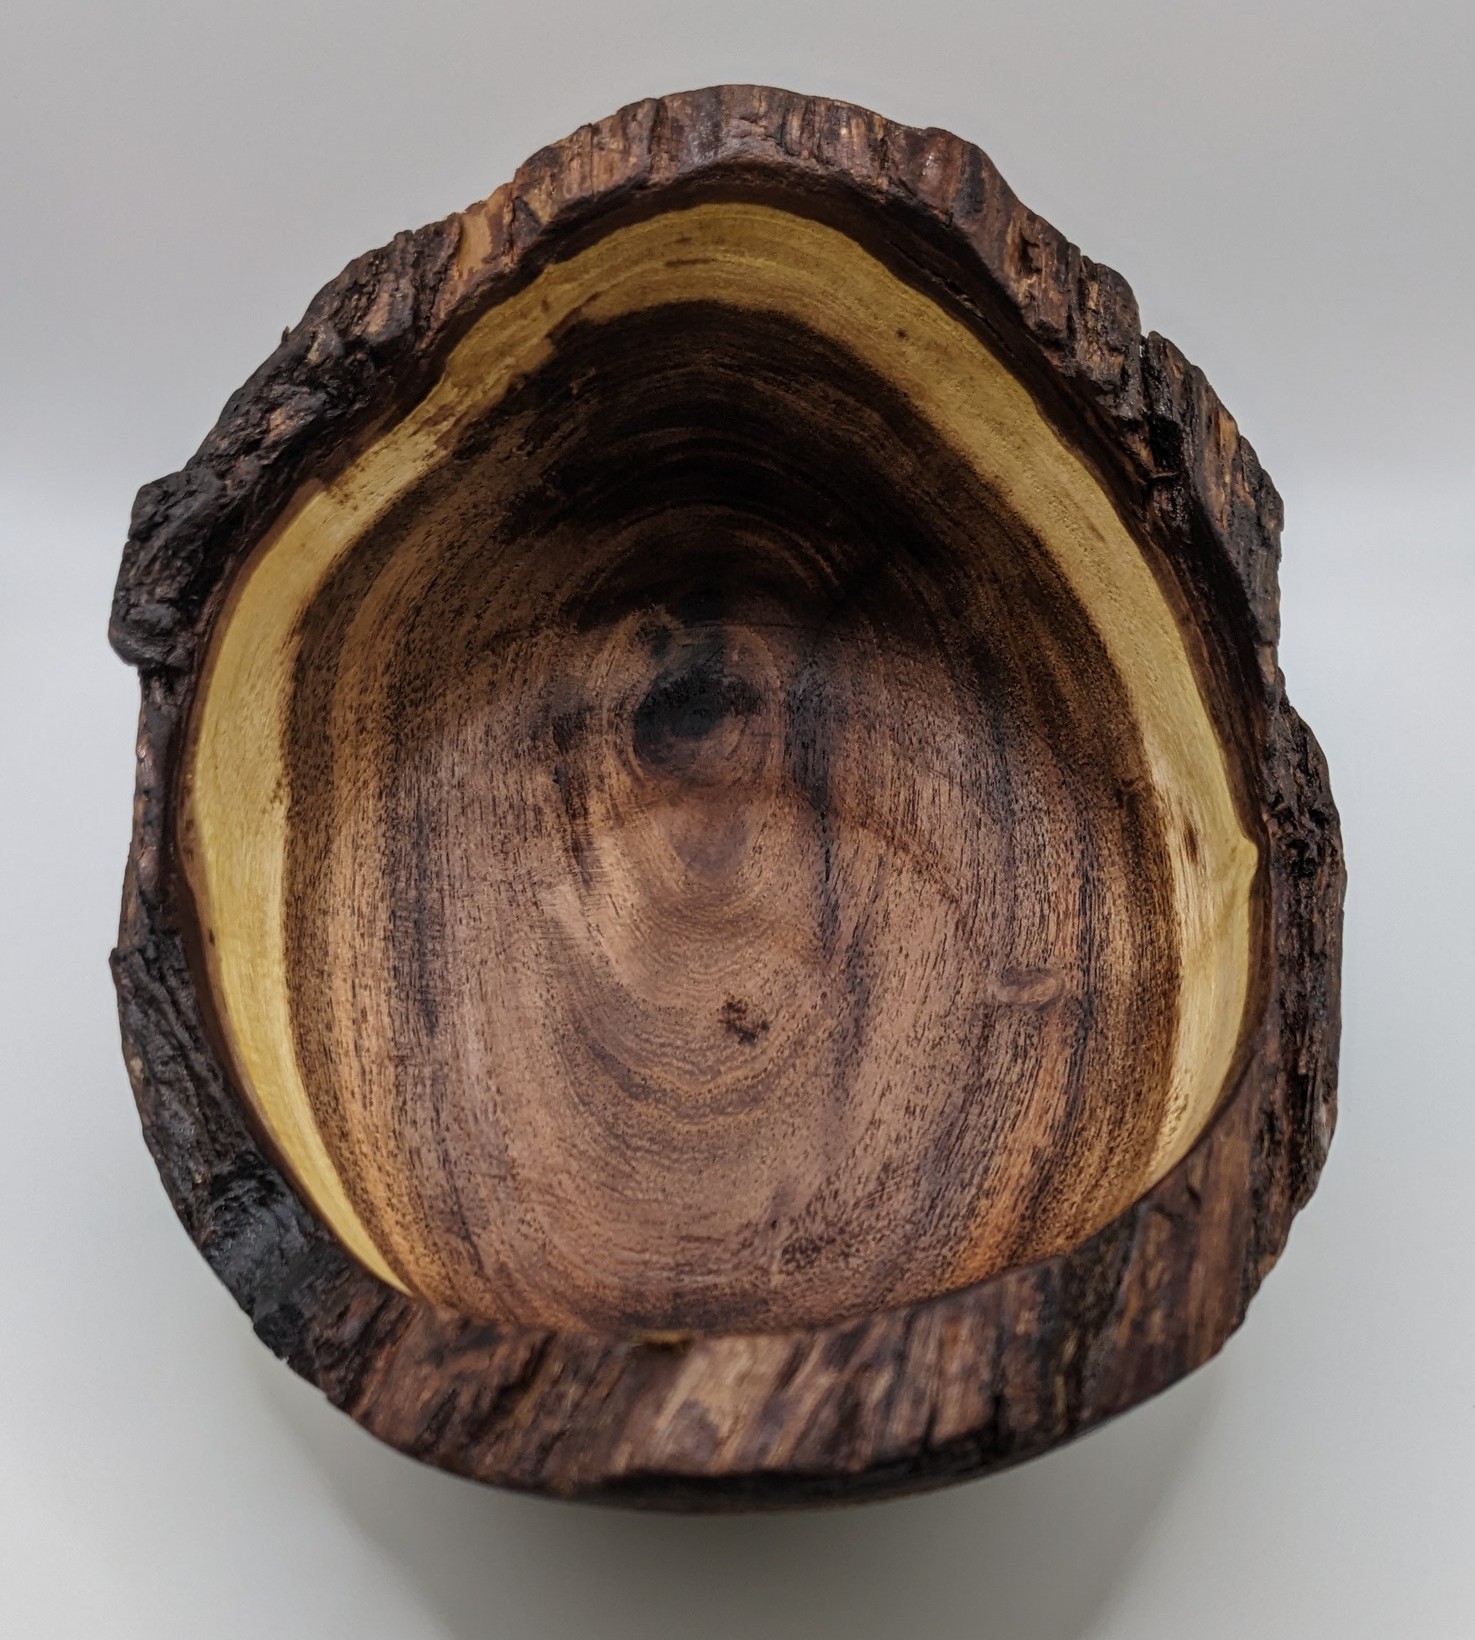


.jpg)
.jpg)
.jpg)


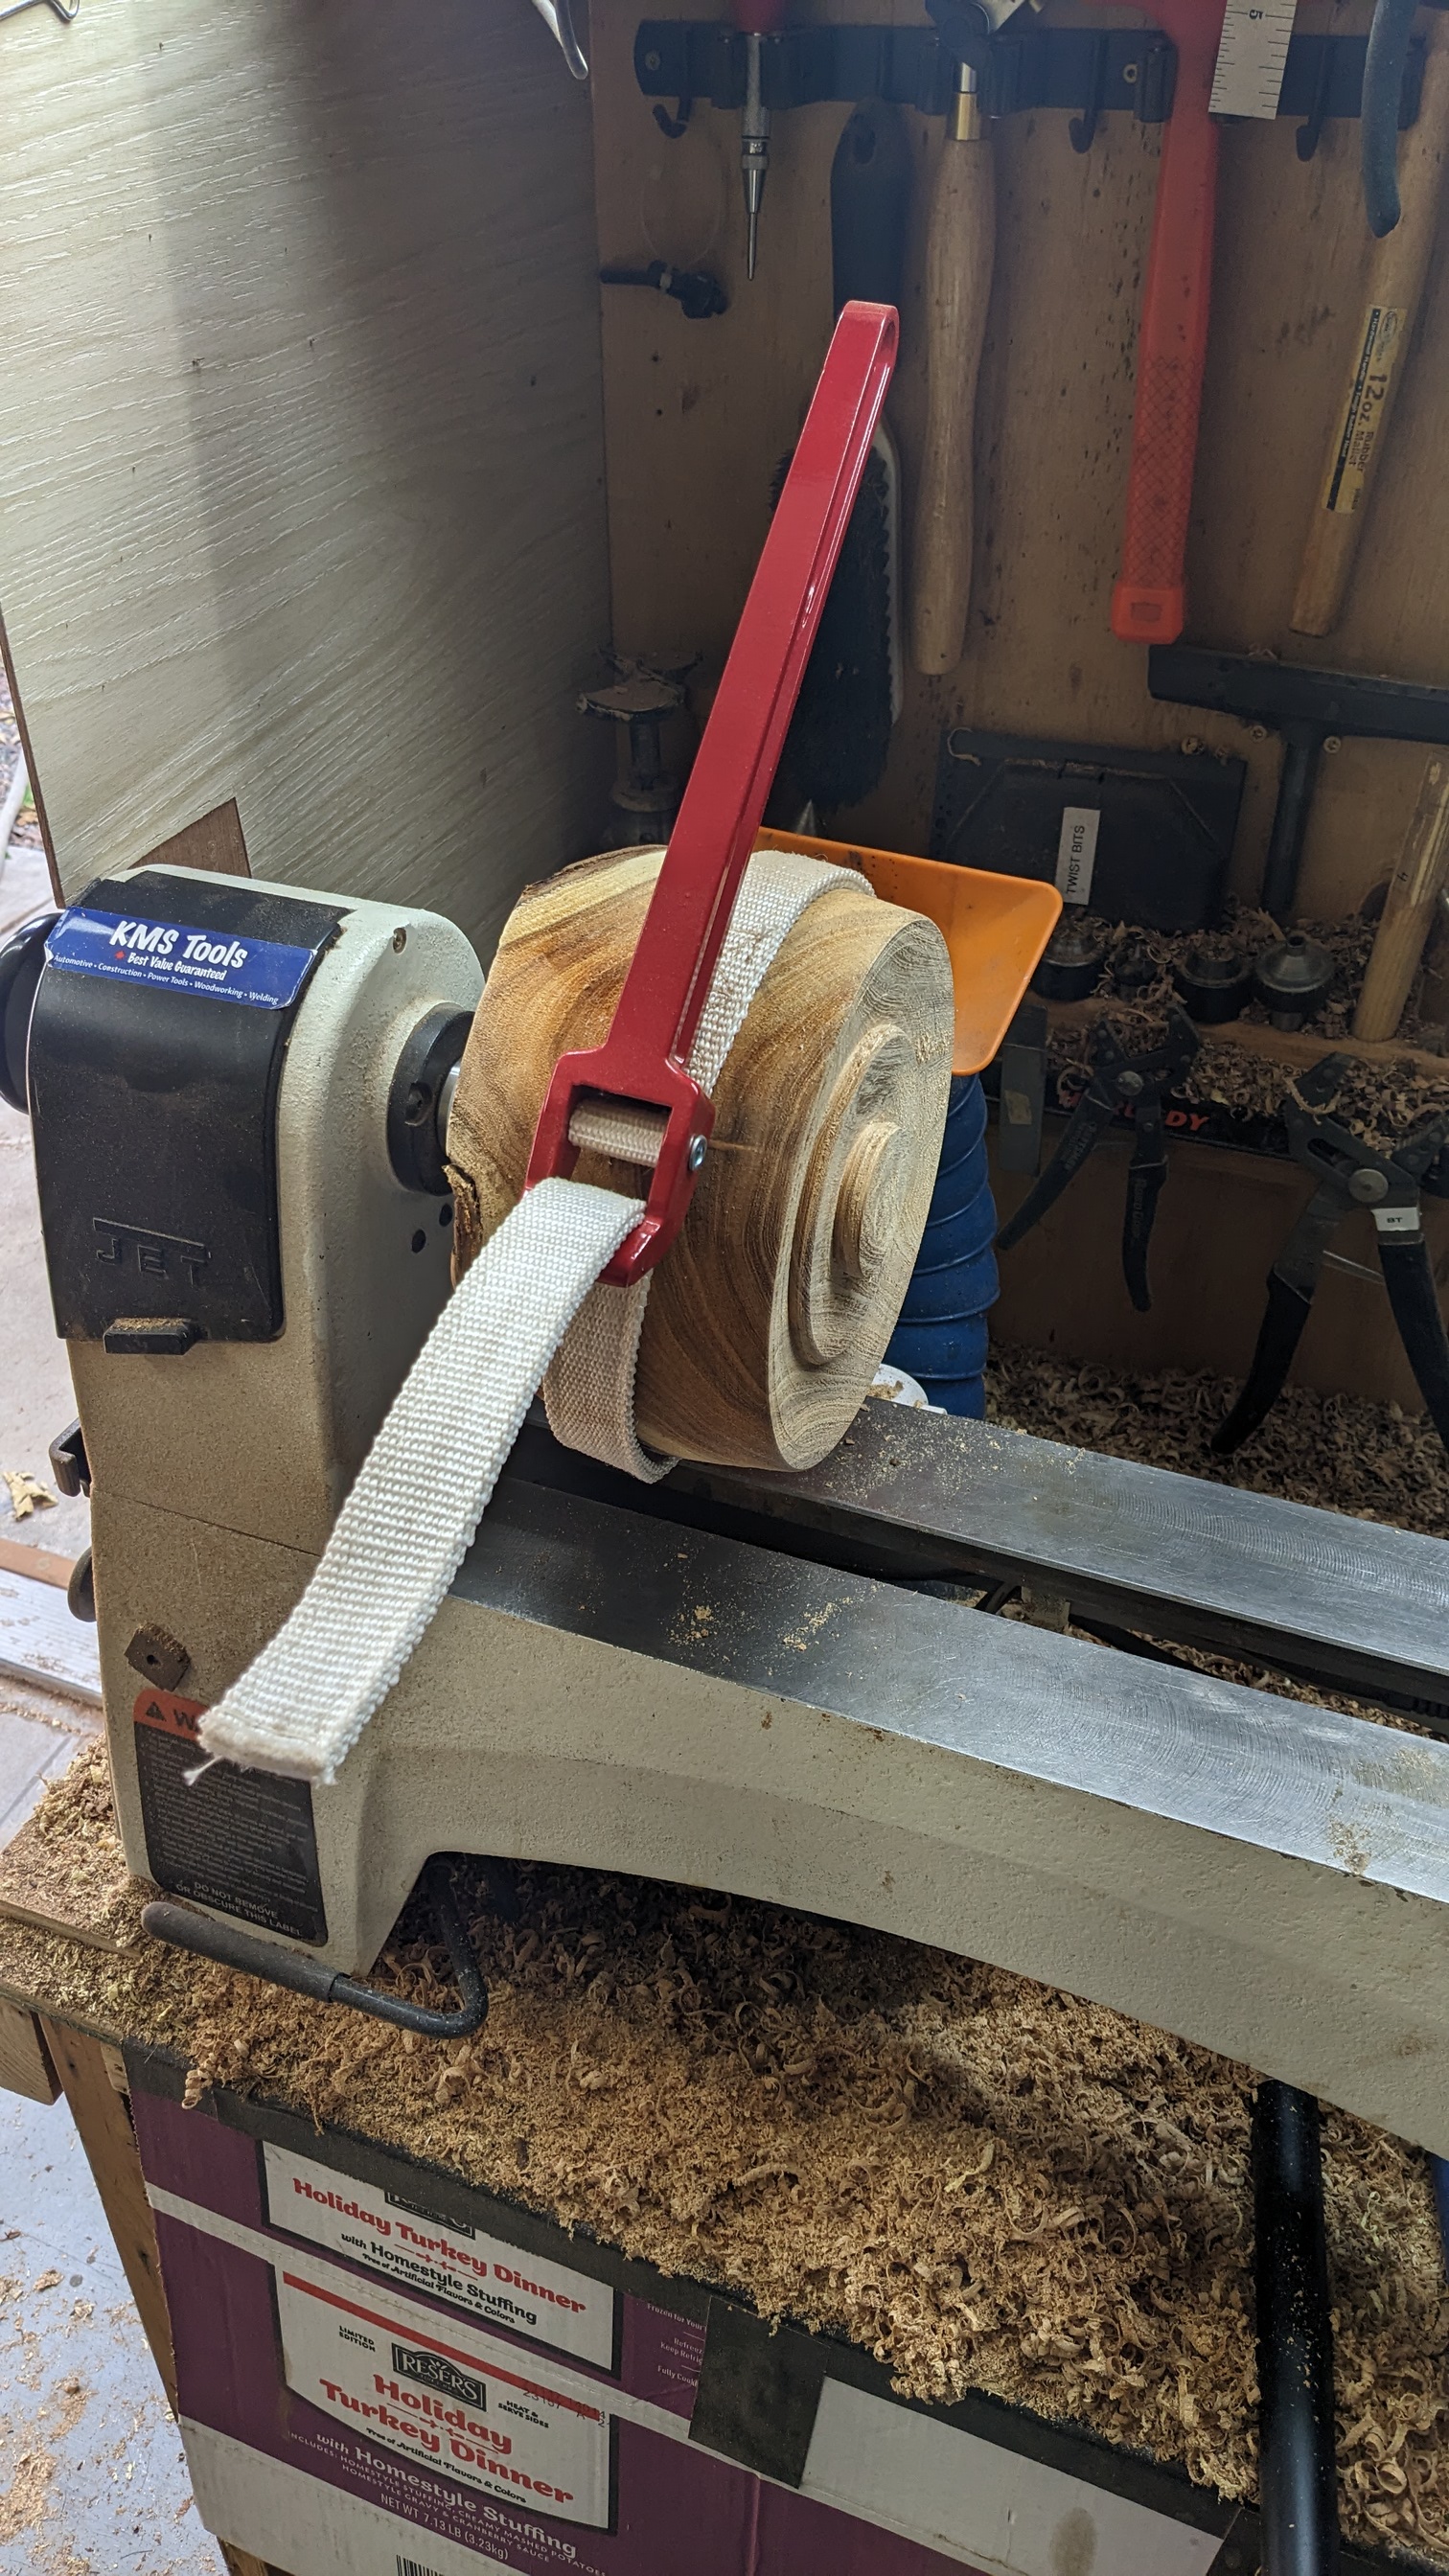


.jpg)
.jpg)
.jpg)
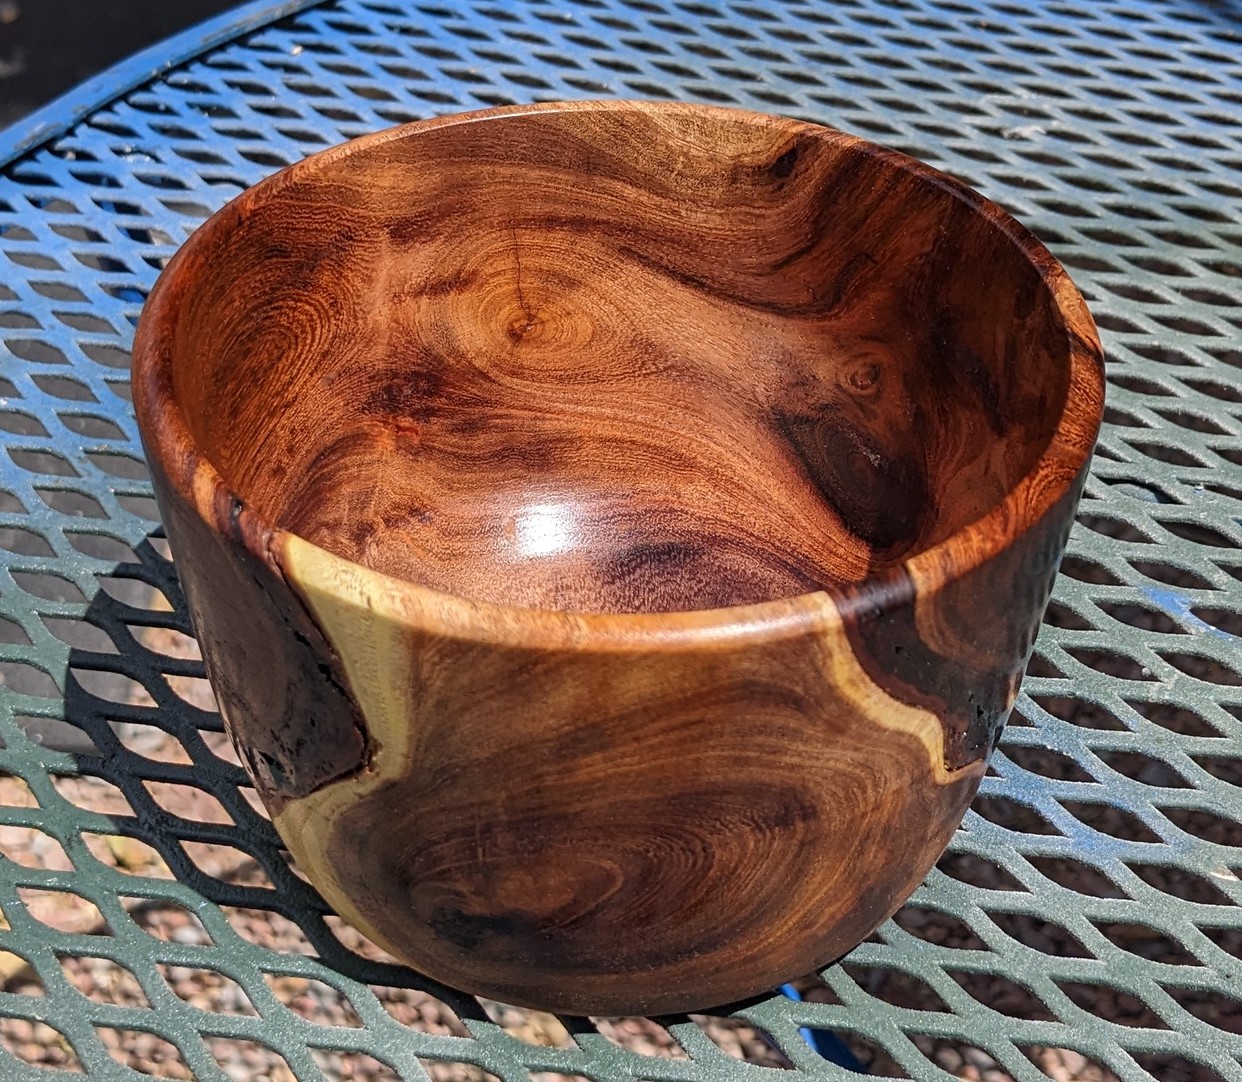


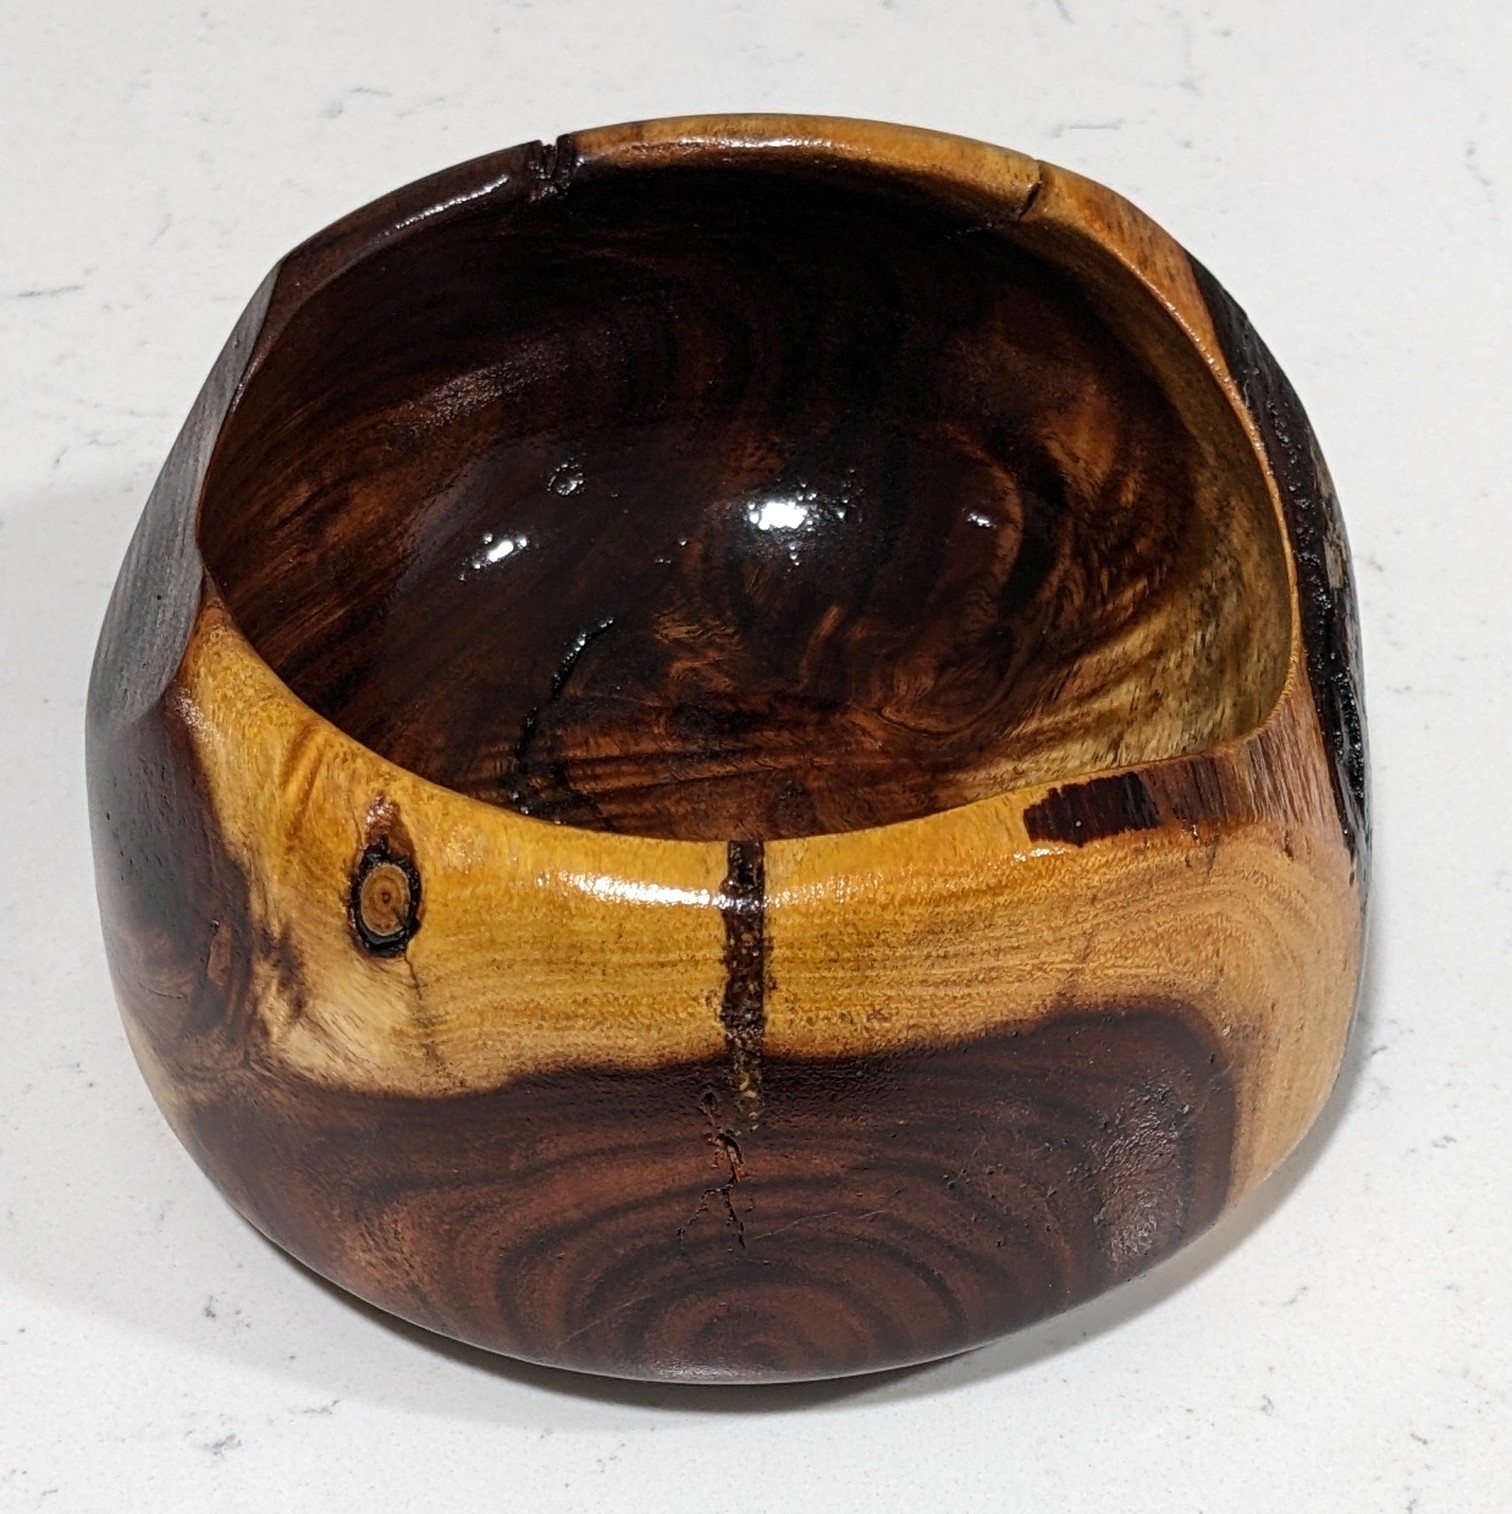


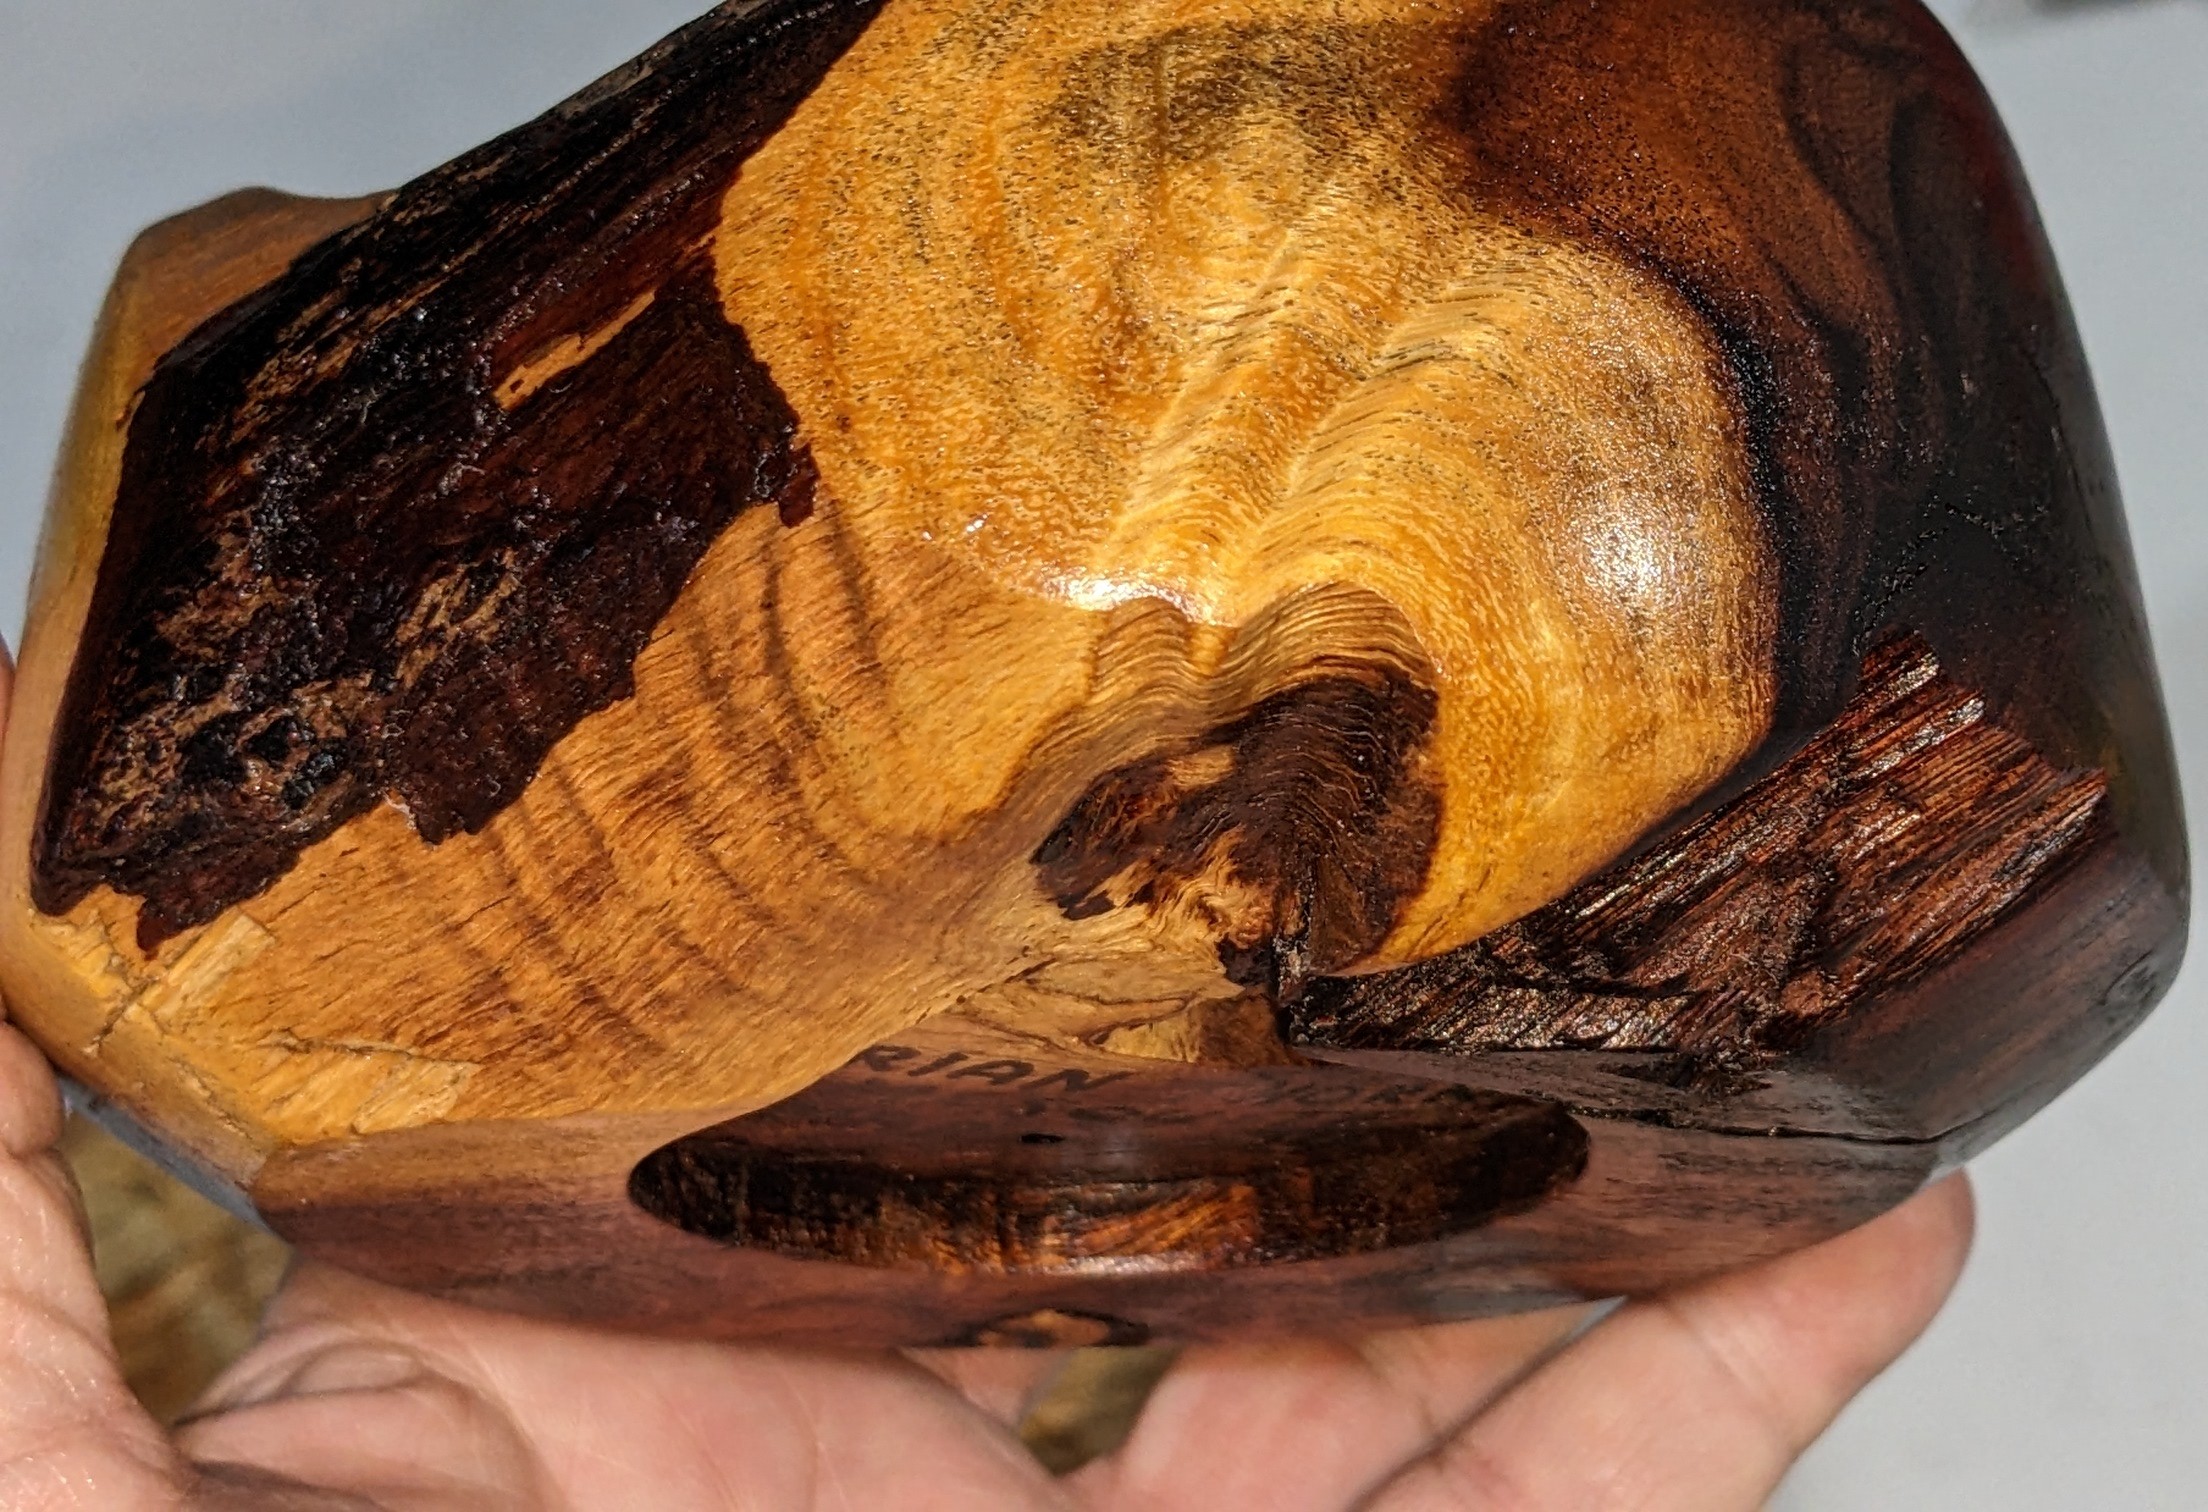


.jpg)
.jpg)
.jpg)


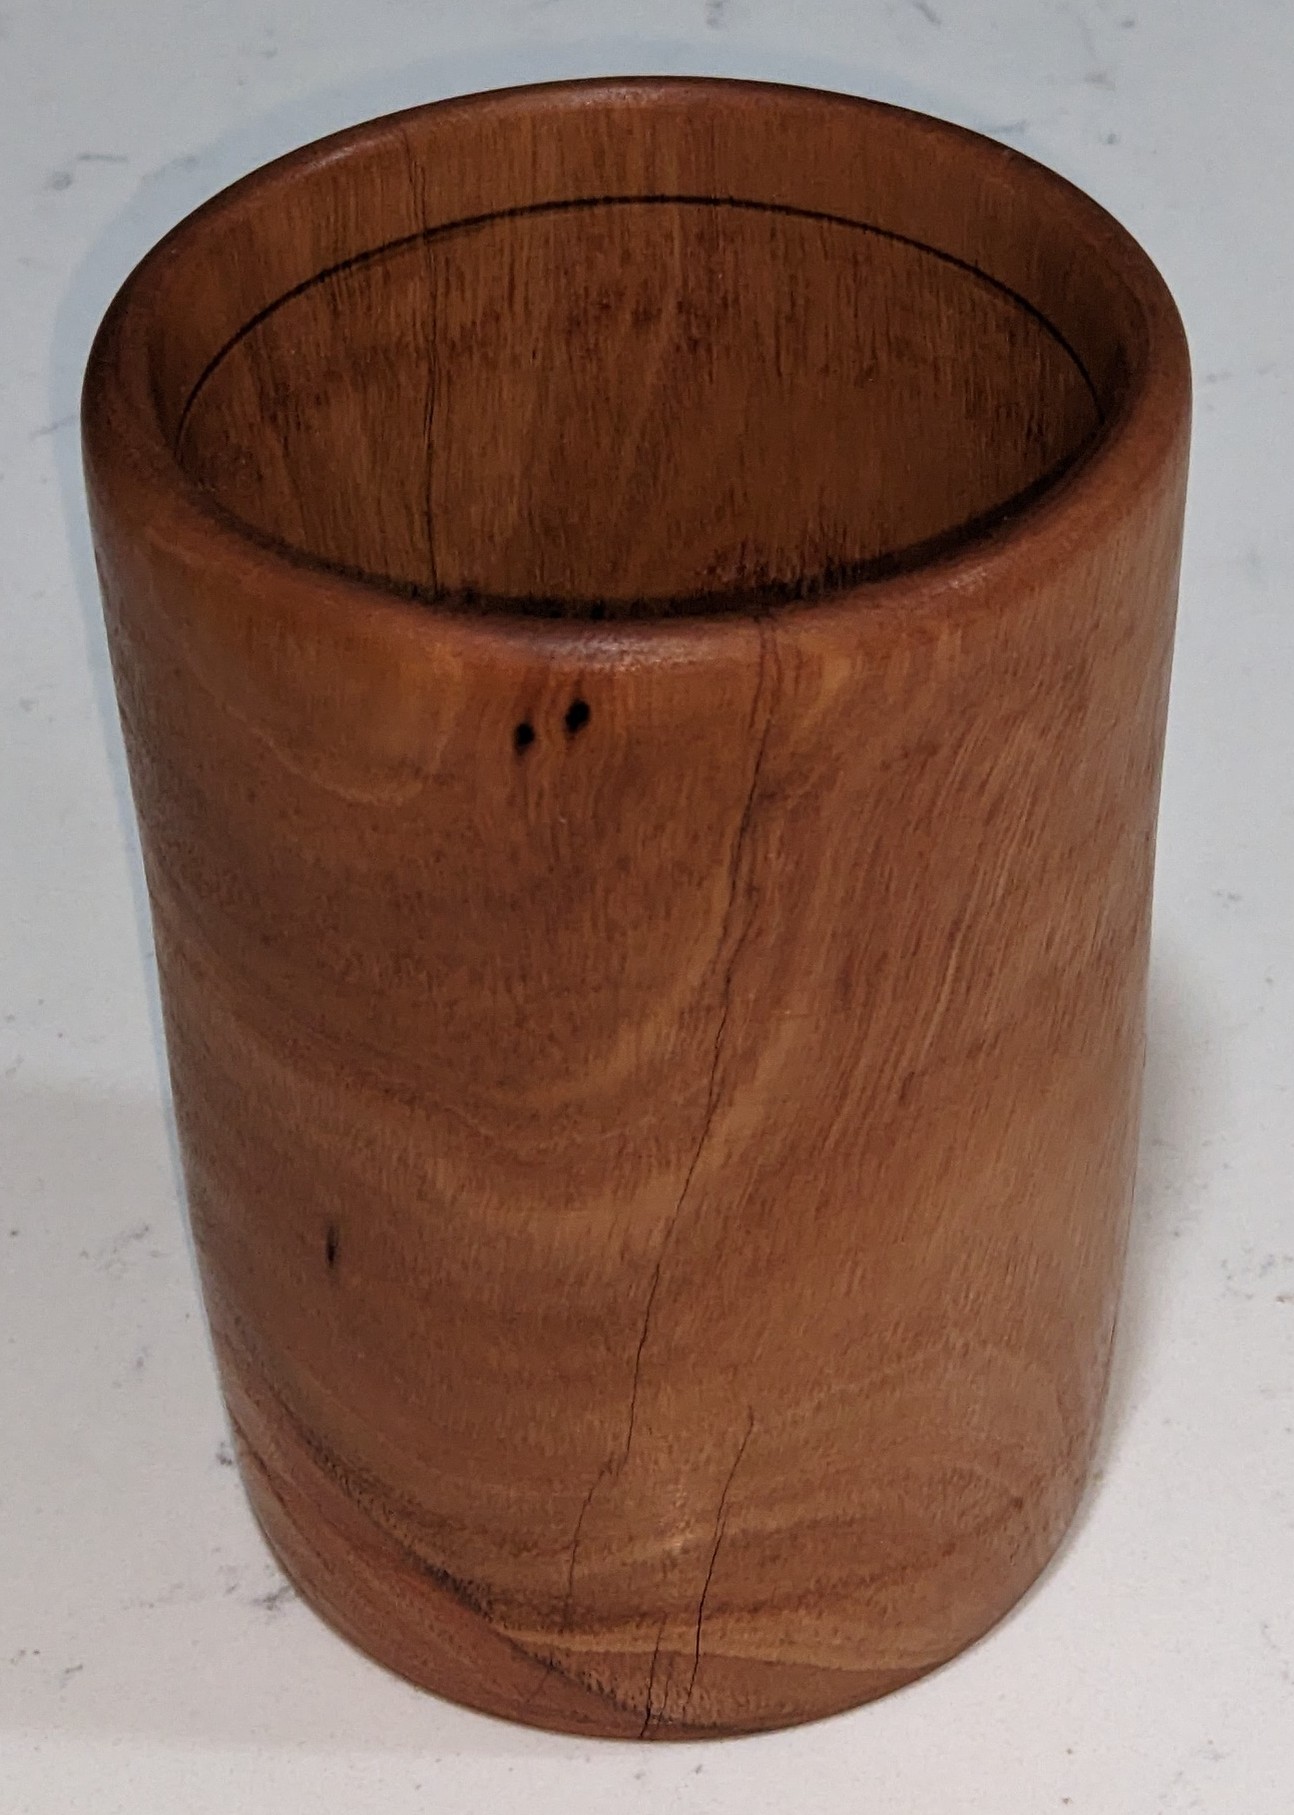


.jpg)
.jpg)


.jpg)


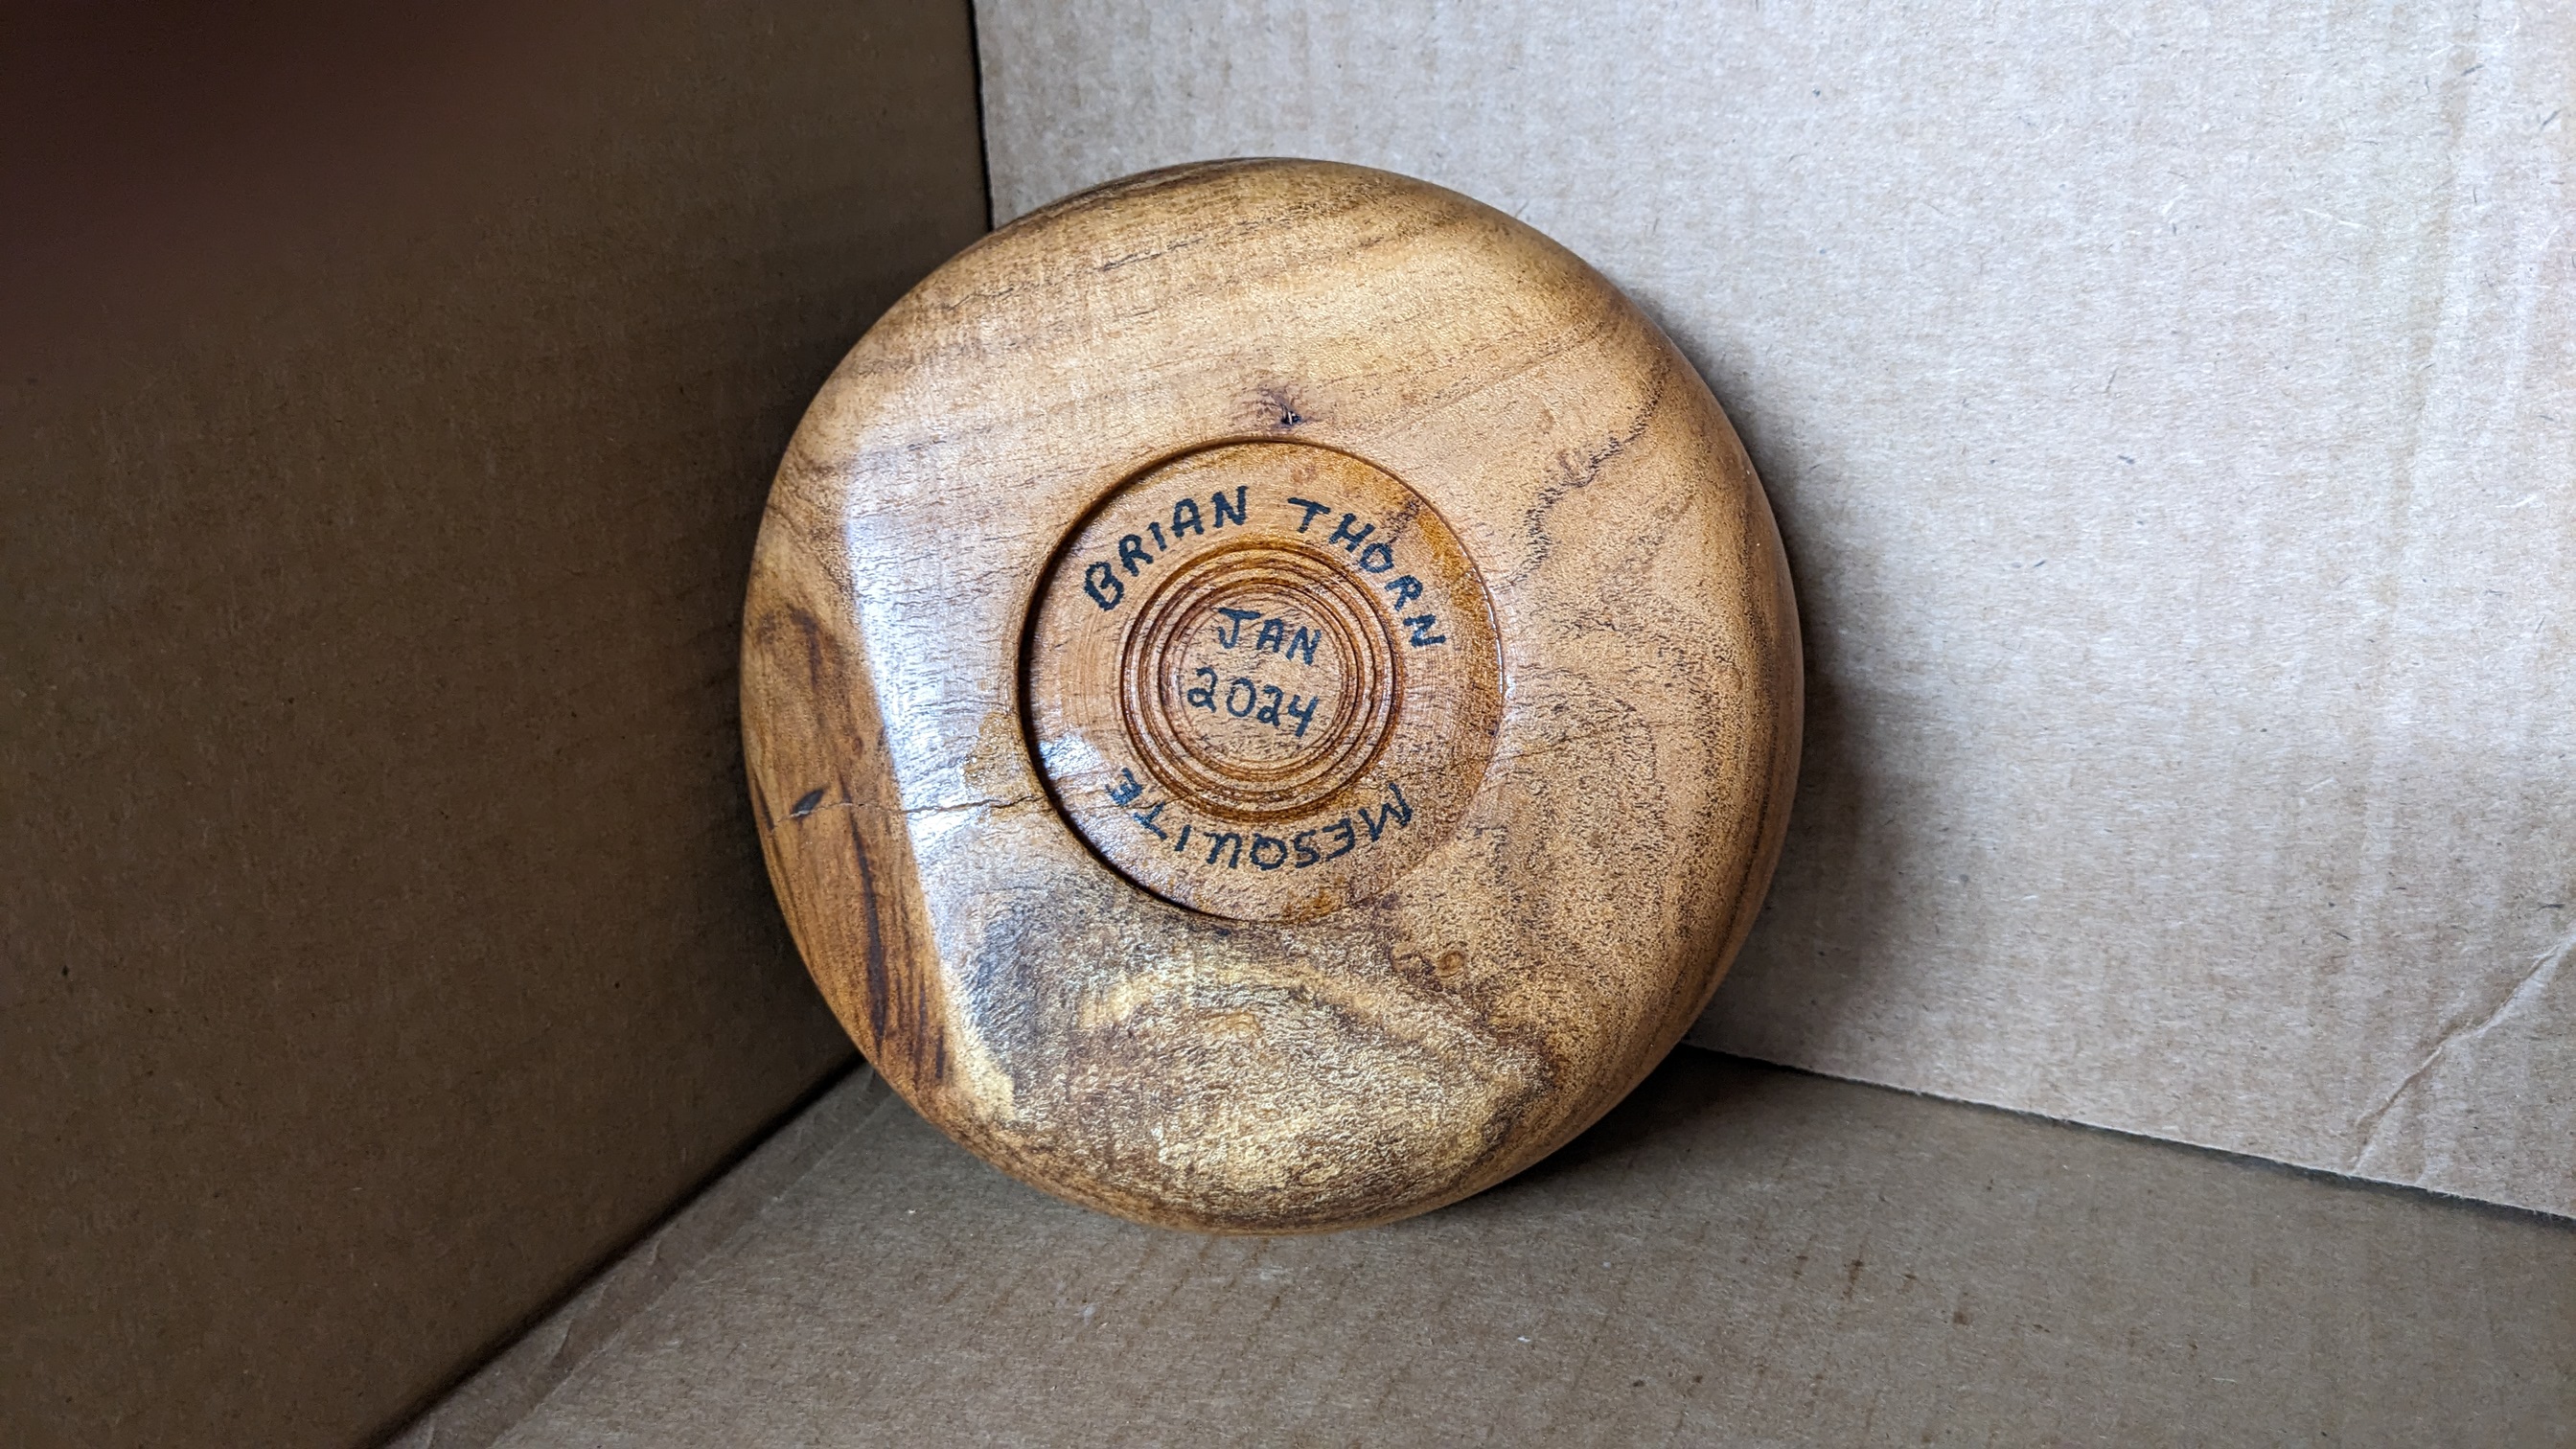


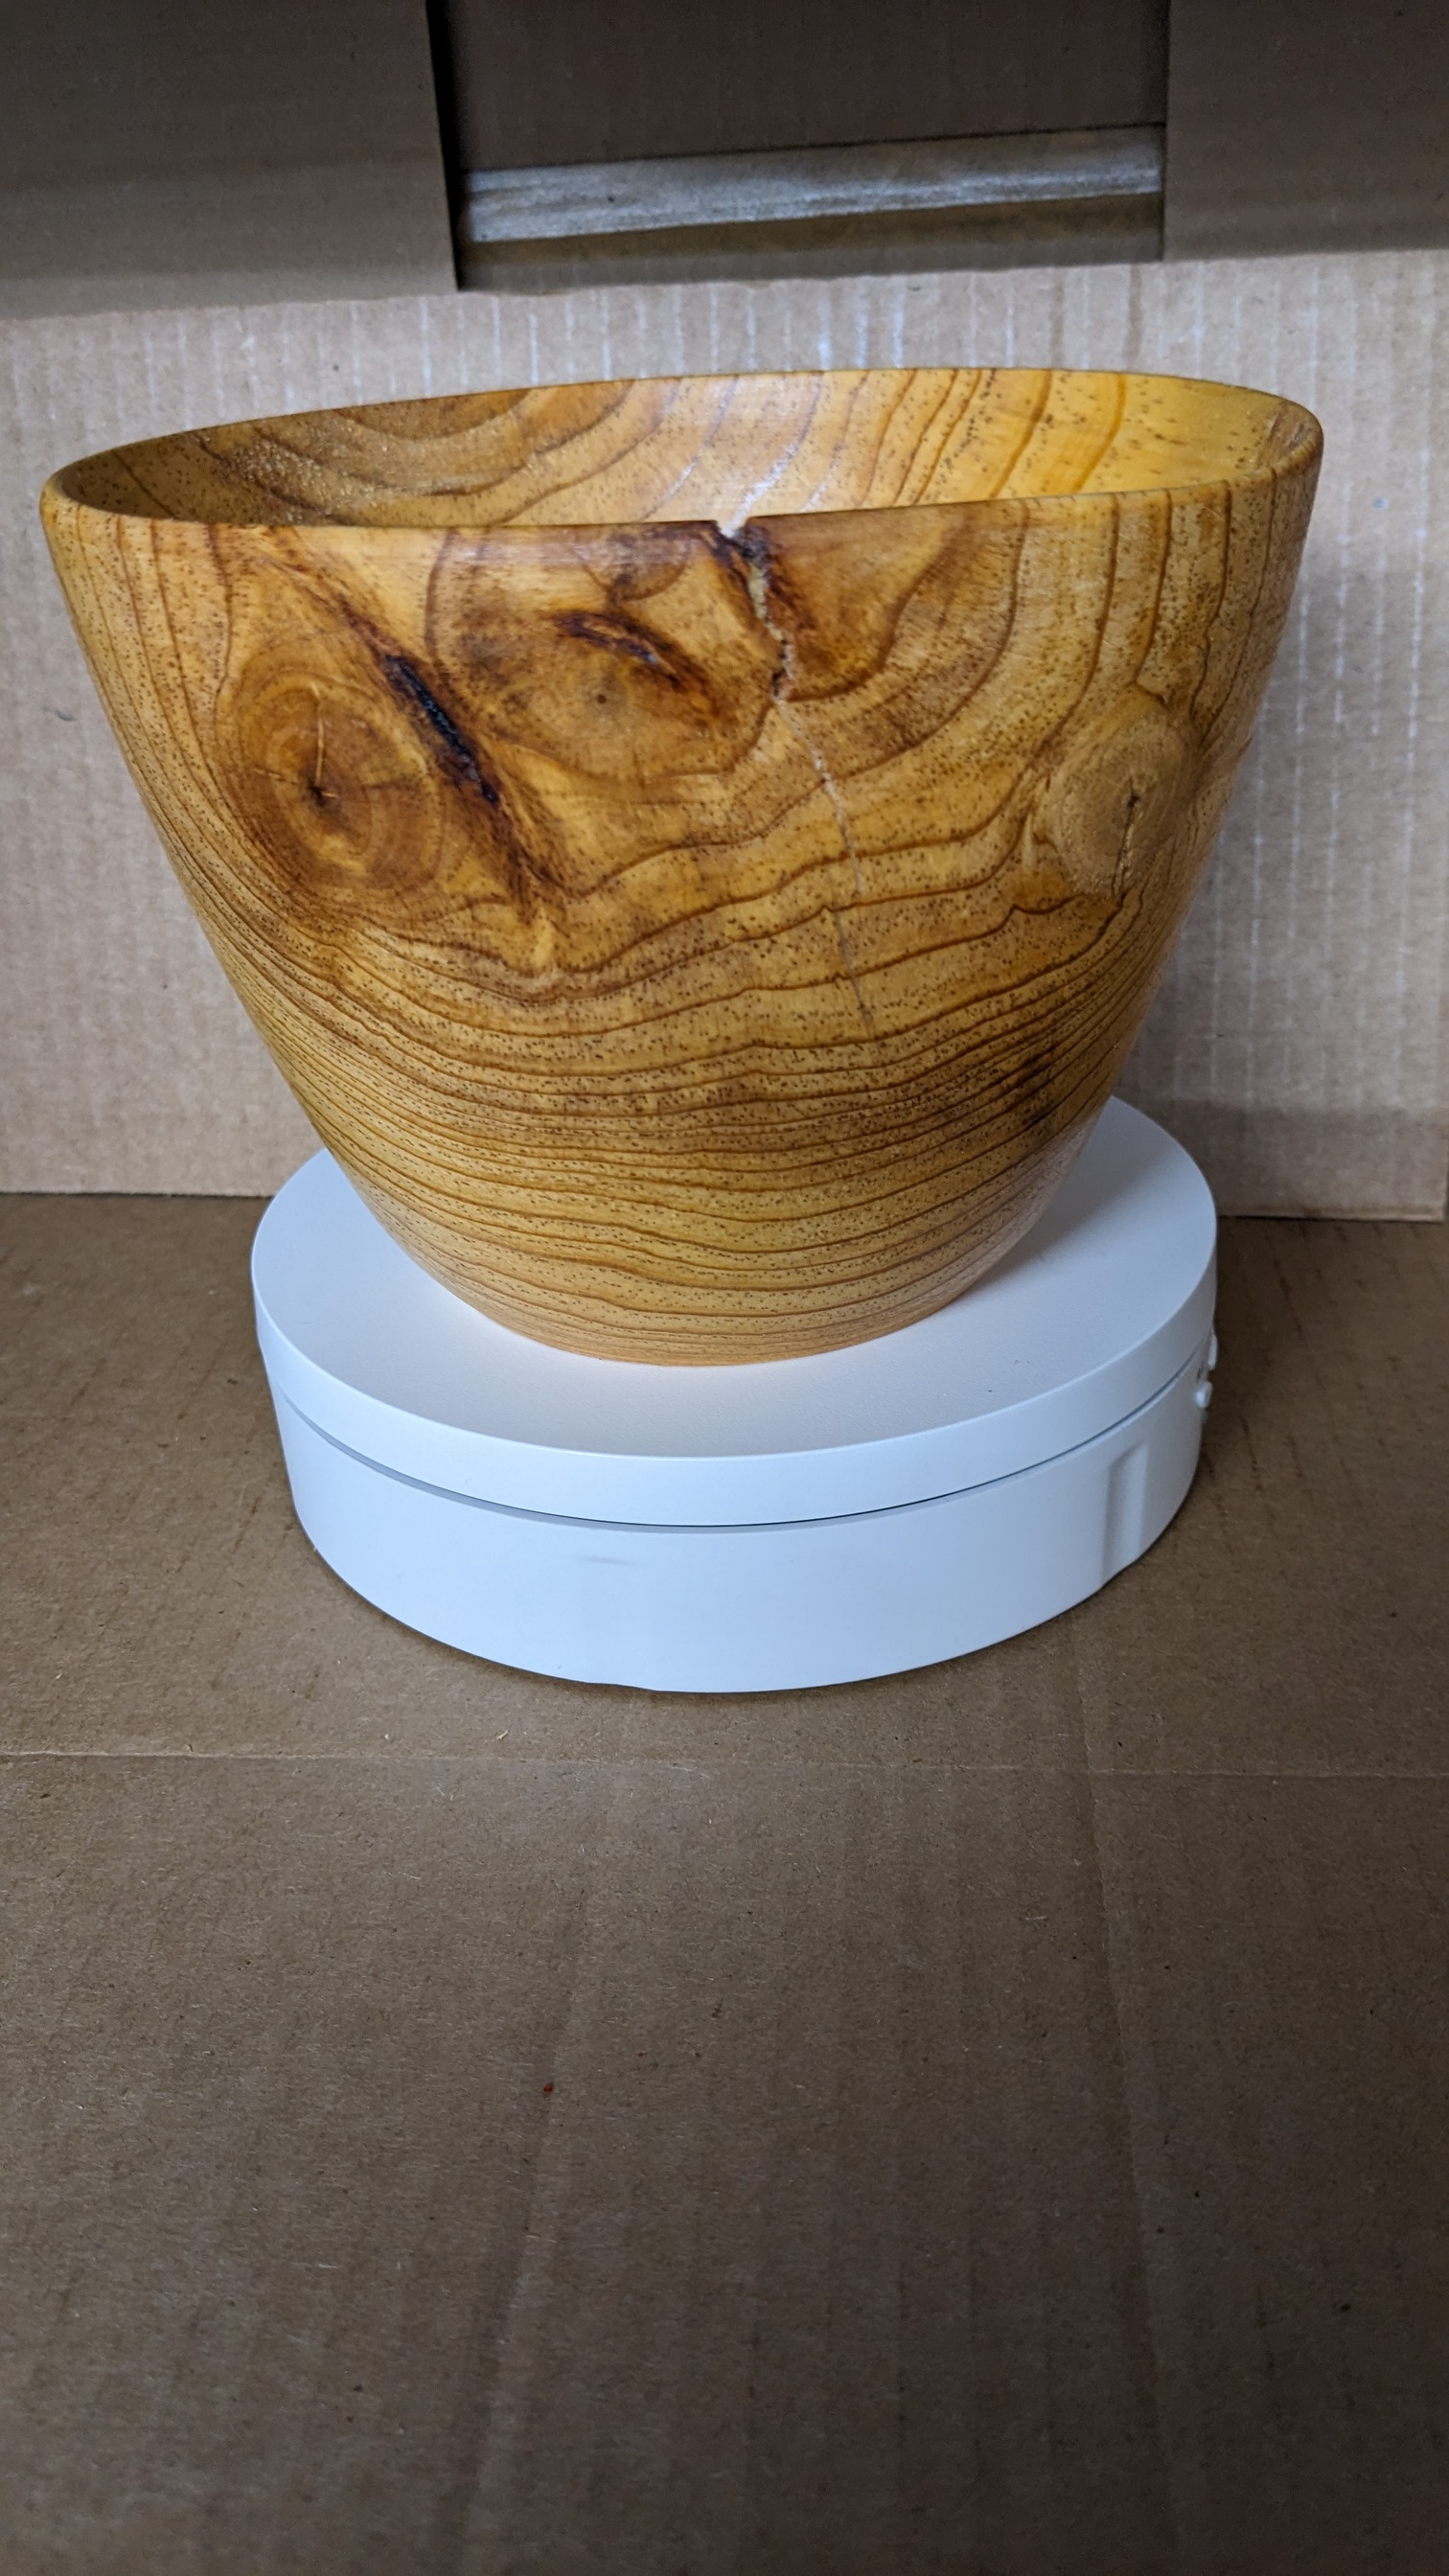


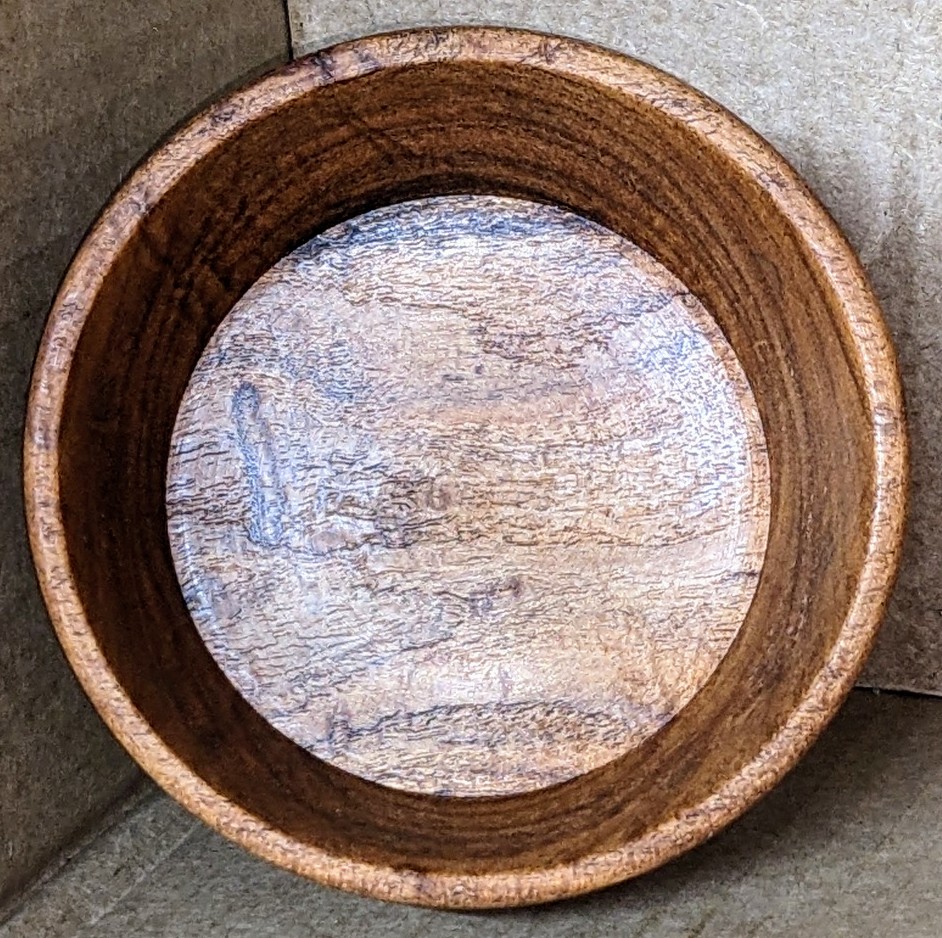


.jpg)
.jpg)


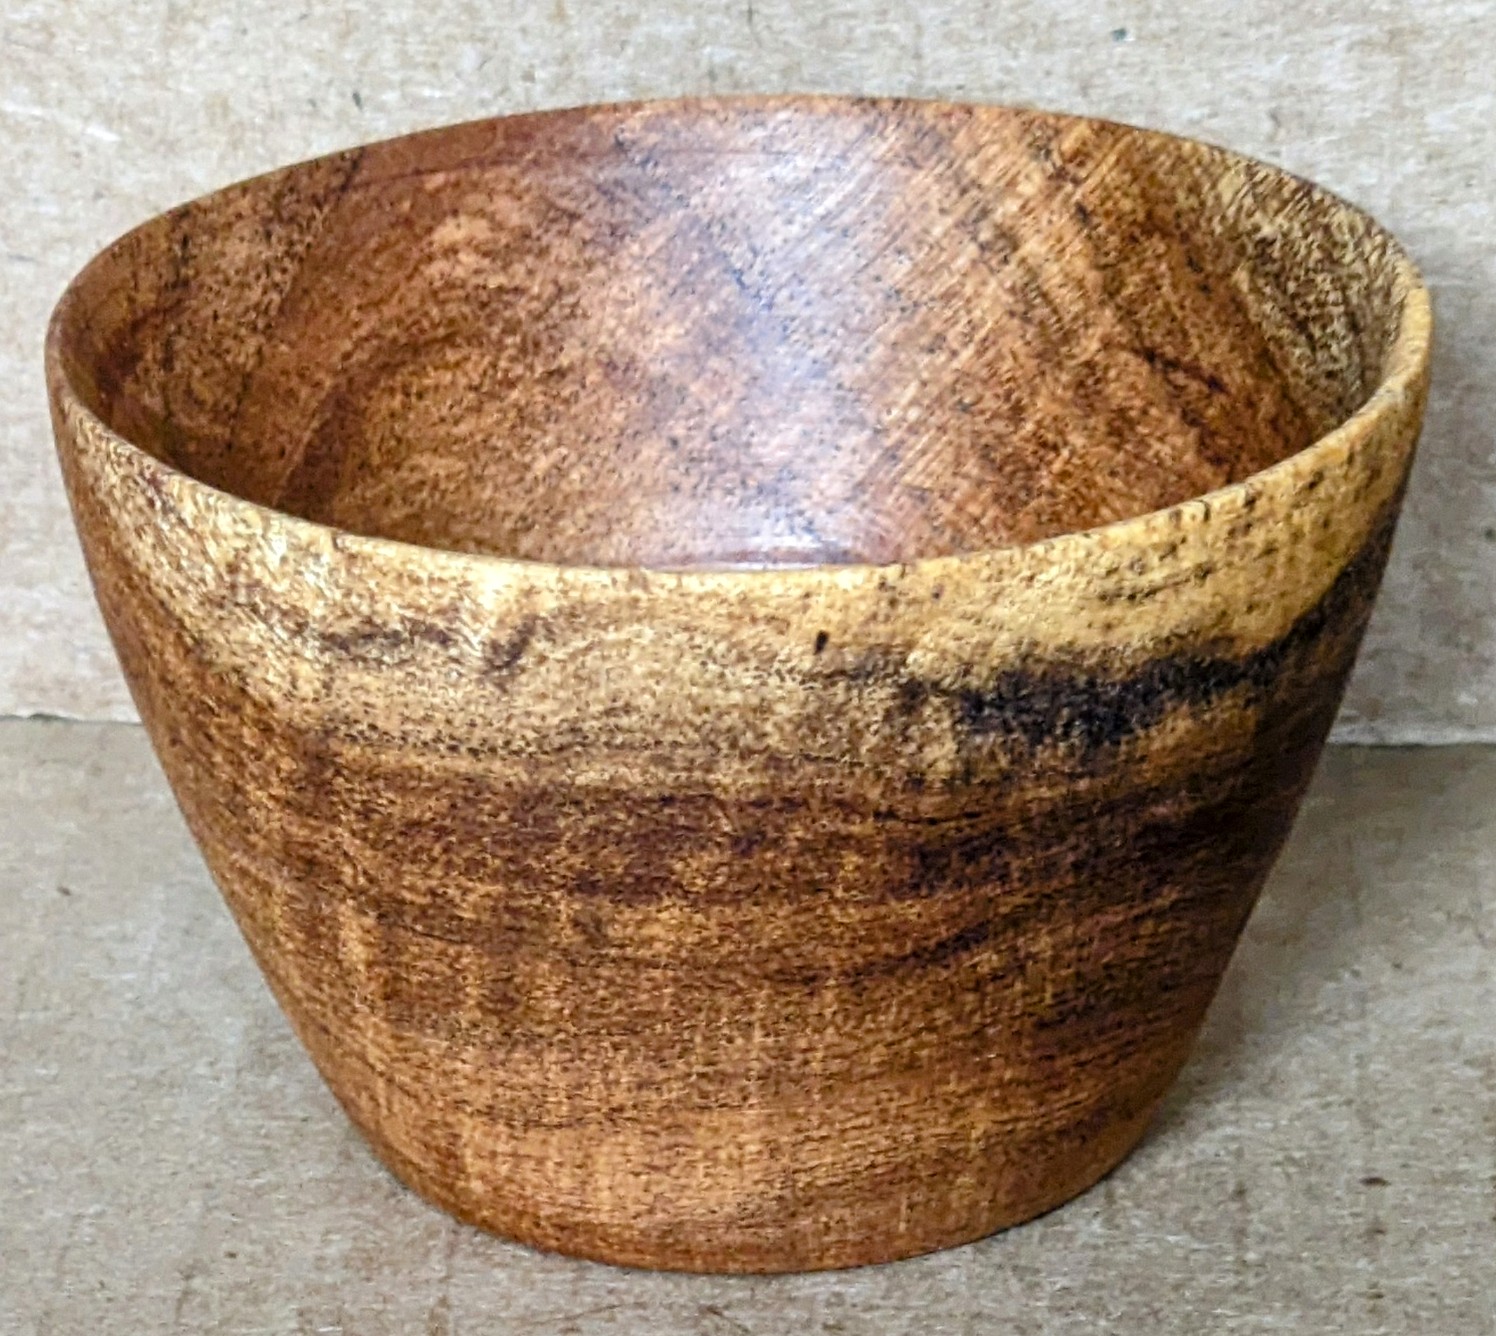


.jpg)
.jpg)
.jpg)


.jpg)
.jpg)


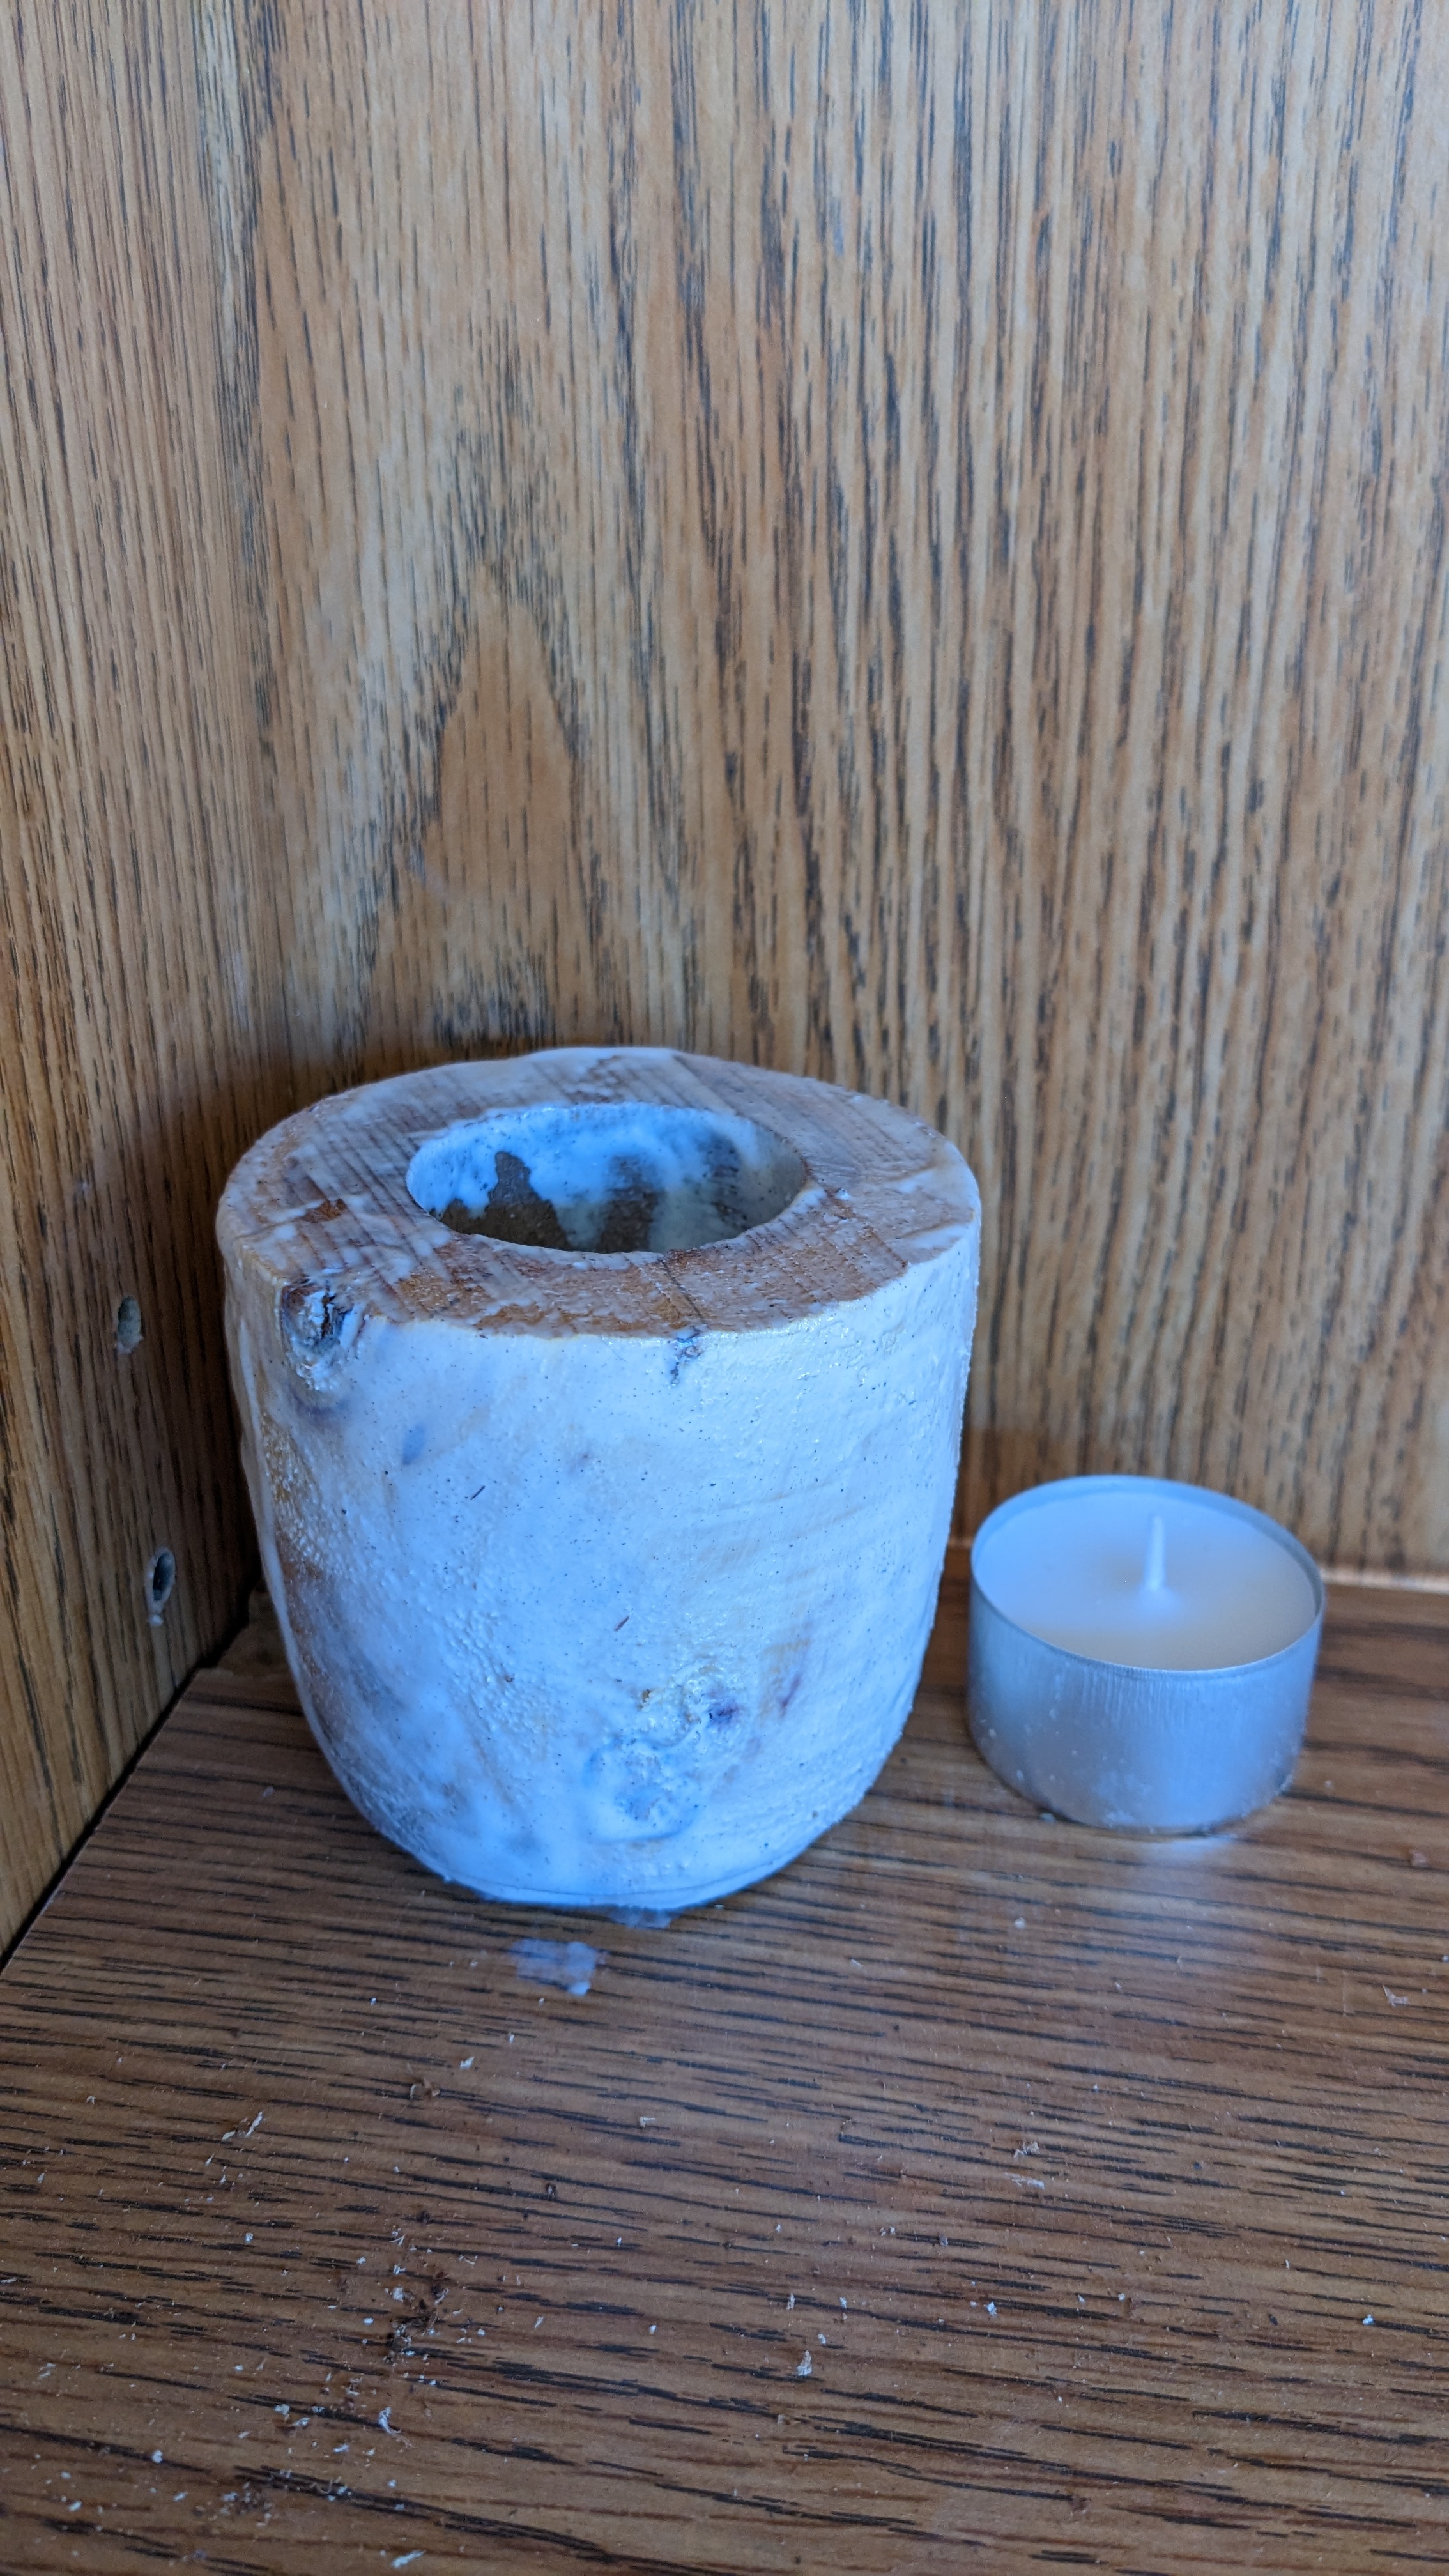


.jpg)
.jpg)


.jpg)


Omg, those dark bowls are captivating, especially the live edged bowls, the side turned bowls...they are stunning.
ReplyDeleteThank you very much.
DeleteThe mesquite bowl I just purchased arrived today, very fast shipping there. This is a treasure of a bowl! Not only is it mesquite wood (personal favorite of mine), but Brian's respect for the wood's personality is evident.
ReplyDeleteThank you, Susan.
Delete